In my last guide to Beauty dishes, I described how they work and how effective they are in the studio to shoot portraiture, especially Hi Key. In this guide I’m going to shed some light (no pun intended) on how Grids and Snoots are used to create mood and atmosphere.
As I also said in my last guide, you can’t shoot efficiently without using the right tools for the job. So often, photographers try to make do with brollies and soft boxes and are disappointed with the overall results. I liken it to trying to shoot everything with a standard lens on a camera. Having the correct accessories for each job makes all the difference and also lets you work easily, efficiently and enables you to achieve the results you want.
Shooting in the studio has many benefits and having total control over your lighting is one of them. You can let your imagination run wild and visualise endless ways to shoot your subject. That’s the fascination for me, using any number of different accessories to create subtle effects and mood changes. To do this - to create those different moods - needs a type of accessory that will control the light and give very small, controllable pools that we can use like tiny brush strokes.
There are two main accessories that are designed for this job, the Grid reflector and the Snoot. They both allow us to shoot the opposite of Hi Key and that’s Low Key. Low Key photography as the name suggests is where we shoot with one, perhaps two lights, each with a Grid or Snoot to give us very small pools of light that can create the light and shade that we need to give us that mood and atmosphere. In a painting, it’s often referred to as ‘chiaroscuro’ light and shade.
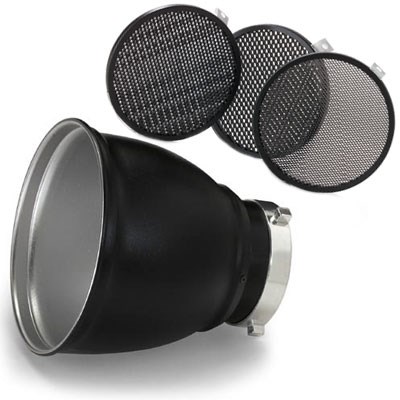
First let me tell you about the virtues of the Grid reflector. The Grid is a small metal reflector that’s been around for a long time and each manufacturer makes its own version. The Grid is usually 18cm in diameter with a soft silver lining. On its own it can be used as a small high-powered reflector, ideal for a variety of applications in commercial work. But the Grid can also be sourced with a set of three honeycombs, perfect for Low Key portraiture.
The Honeycombs are circular thin metal discs with a series of holes just like a bee’s honeycomb, and come in three sizes with large, medium and small inch holes. The Honeycomb discs, slot into the end of the Grid reflector, turning into a large Snoot. The effect of the Honeycomb is twofold, to cut the light output from the flash head and only to allow a small amount of very direct light, with no spillage onto the subject.
Obviously the larger the diameter hole in the Honeycomb, the more light, the smaller the hole the less light. The holes sizes are normally 3/8th, 1/4th and 1/8th of an inch. So you can see that having those three Honeycomb options makes the Grid reflector a very versatile studio tool, especially for Low Key shots.
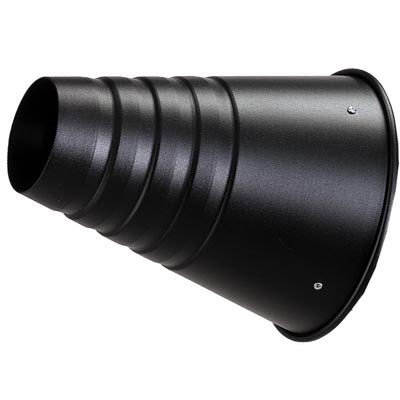
The second key item is the Snoot, again an accessory that’s been around a long time. The classic conical Snoot, (usually a 15 degree angle of output), is shaped like an ice cream cone and is also designed to restrict the light output and control it in the same way as the Grid reflector.
Like the Grid, the Snoot can be used as it is, allowing a pool of light onto the subject, and like the Grid it can also be used with a small Honeycomb that fits into the smallest end, restricting the output and reducing the pool of light available.
If you don’t possess a Grid or a Snoot, buy the Grid and Honeycomb set first. It’s much more versatile and will give you more opportunities to experiment, you can always add a Snoot later on. Don’t forget Christmas is coming so you can always add it to your list!
How do we use these two accessories to get the best out of them?
The best way to get started is to follow a few simple steps.
Step One
Make sure that you can shoot in total darkness if you can, or as near as you can get to it. You can’t expect to get really good Low Key shots if you have too much ambient light in your shooting space. So hang up blinds, draw curtains, cover windows and shut doors - anything you can do to make the space as dark as possible.
Step Two - Backgrounds
Ideally a black cloth background with a very dense weave is the perfect way to shoot Low Key. The WexPro 3 x 6 metre Wrinkle Free Black Background is ideal. That type of cloth background works well because it absorbs all the light that strays onto it. But, if you don’t have one please don’t panic, it’s something that can be added later.
In the meantime, choose something that’s dark, a wall, some curtains etc. If you don’t have these, don’t panic again just shoot your subject as far from your background as possible, keeping the light at angles so that light doesn’t stray onto it.
Step Three
Find a model, someone who has a lot of patience because shooting Low Key does take time. Find someone with an interesting face, young, or old it doesn’t matter because to get started you only need to shoot head and shoulders, the best way to master the techniques before shooting bigger subjects.
Step Four
With the studio space dark enough and the model sitting nicely relaxed on a comfy chair, you can think about lighting. Working with one light is always the best way to start any shoot, so whether you use a Snoot or the Grid with a Honeycomb, just point the light front on, about 2.5 metres away, just under head high to the model and start shooting.
Use a lens that will shoot head and shoulders, an 85mm is ideal. First check the exposure, either by metering or taking a couple of test shots. Keep the model still and move the light and stand in an arc around the model from front on, to fully side on, taking a series of images as you go. Always look at the eyes and shadows very carefully to see what’s happening.
I find that shooting in black and white really helps you to see this process. I know that most of you will prefer to shoot in colour and convert later, that’s fine, but shooting in black and white, just as a guide will really help you get started and help you see where those shadows are.
When you’ve tried that exercise of moving the light through 90 degrees, try the next step, another very easy one. Go back to the beginning with the light front on to your subject, just under head height. This time, swivel the head on the stand horizontally, very, very slowly away from the subject. ‘Feathering’ the light on the model in this way will create a whole host of possibilities. As the light moves off and away from the face, the shadows will change dramatically. You can also ‘feather’ the head, again very slowly, by tilting it up and down vertically on the stand, again creating some wonderful shadows.
I recently spent the day with two old friends of mine who wanted to know more about Low Key and we had a great day shooting a couple of super models: one older, one younger in that style. My colleague has a nice studio with blinds and curtains across the doors, so we started with step one, making sure that the studio was as dark as possible.
With a black paper background set up and unwound, as in step two, we sat the first model down on a chair 2 metres away from the background, as in step three, ready to get started. We used one single Bowens 250R, placed front on to our model, 2.5 metres away, using a Grid reflector and the smallest 1/8th inch Honeycomb. As always, I shoot at 100 ISO, at 125th of a second on Auto White Balance, selecting an appropriate aperture. To achieve my preferred aperture, I simply adjust the power of the head up or down.
As in step four, we shot some test shots front on and then moved the head around the model in an arc, shooting in black and white to see where the shadows were, a neat trick, although I say it myself! We paid particular attention to the eyes, making sure they each had a catch light.
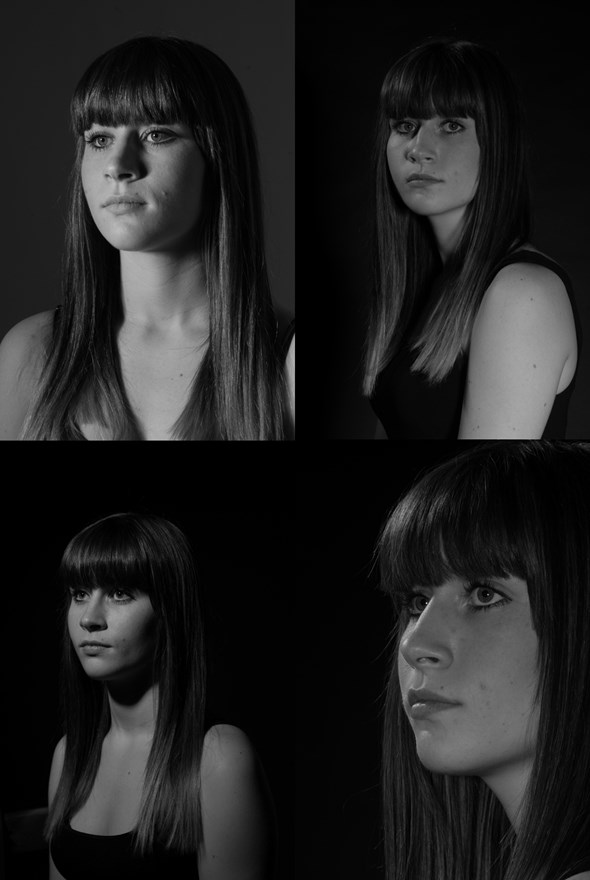
This series of images was taken with one light using the Grid / Honeycomb combination.
Using that technique of moving the light around the subject and the other technique of ‘feathering’ the flash head, both swivelling it horizontally and tilting it up and down vertically will give you endless possibilities. Its good to get in close if you can, trying to fill the frame with a close up of just the head, it makes a stunning portrait.
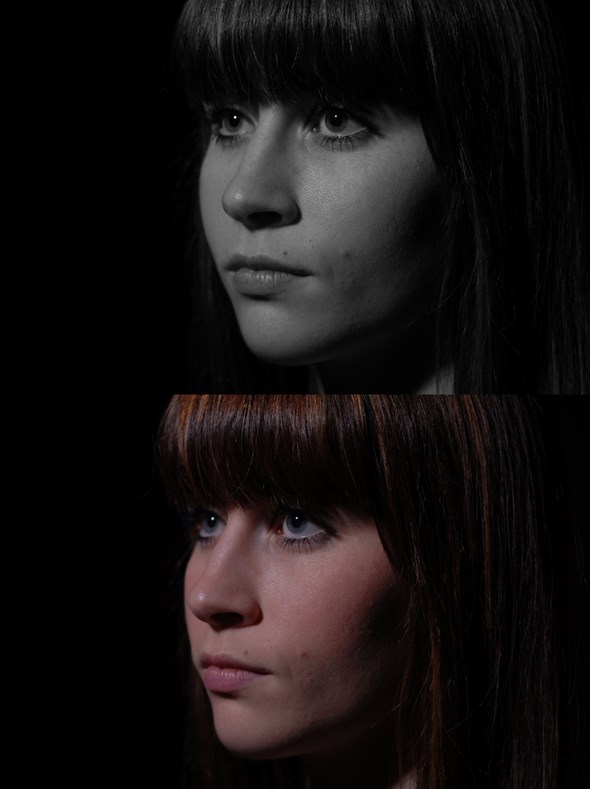
When you've tried those techniques, move on to try some overhead lighting. With your subject still sitting comfortably I hope, use one light with either the Grid or Snoot / Honeycomb combination above the subject this time, pointing directly downwards. Try to get the flash head as high above the subject as you can, most stands will go up to about 8 or 9 feet. Shoot some test shots and rather than move the stand, move the subject an inch at a time from front on, to side on. The effects can be really interesting as the light falls on different parts of the face.
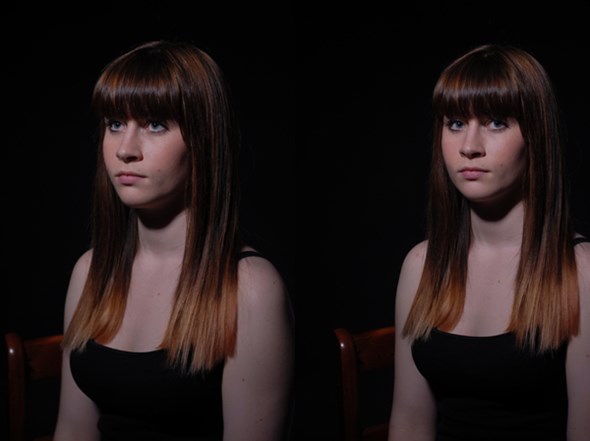
When the overhead lighting is working well, bring in a second head to light from the floor, pointing upwards towards the subject. Use the Grid or Snoot on this second head, again with a Honeycomb. This second light will remove any shadows created by the overhead light and push some added light into the chest and face. One thing you might need here is a floor stand. Unfortunately, most kit stands will only go down to around waist height, so by adding a floor stand, you will be able to get the flash head down to almost ground level, its well worth the investment.
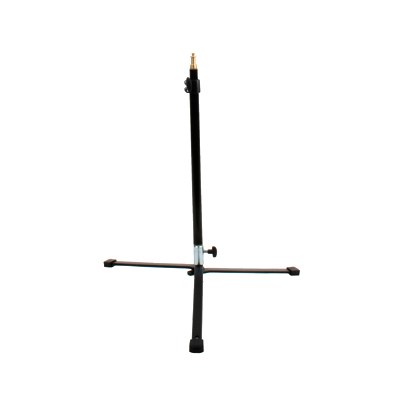
Talking about floor stands; they are absolutely perfect for portrait photographers that shoot subjects on the floor, especially for Hi Key children’s stuff. I see so many nice portraits ruined by photographers who have used ordinary stands and pointed the lights downwards to light kids on the floor. The result is that often there are no catch lights in the eyes and the overall look can be a bit dull. Using a simple floor stand gets the flash head down to the right level. The difference is amazing, try it!
Anyway, back to the Low Key stuff, by adding that second head on the floor will again give you endless possibilities to shoot. As for exposure, keep the overhead light as it was and then just start the floor light on its lowest power and then add as necessary until you get the effect you want.
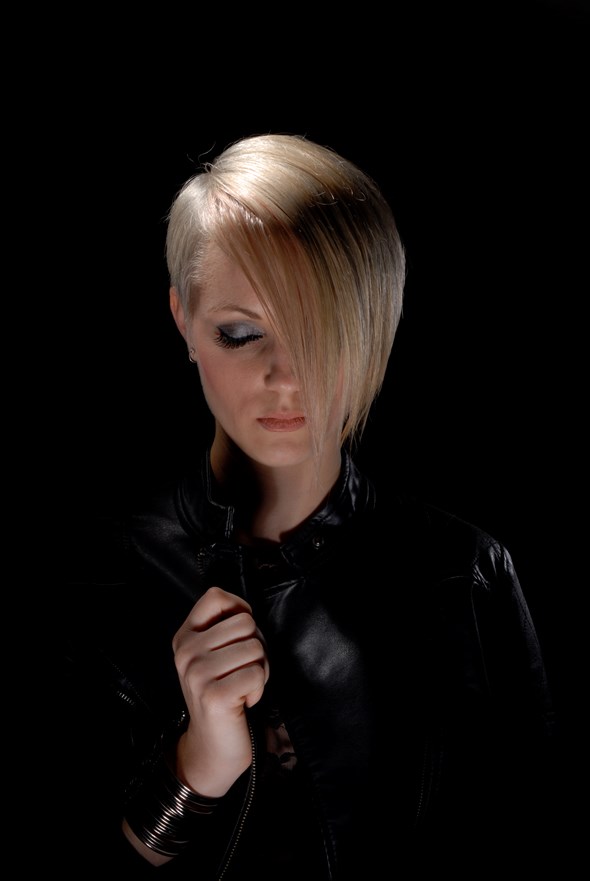
I was talking about this type of exposure with a client only a week ago. They asked me to give them precise lighting ratios for their main light and hair light. As you will see from using that overhead light, you need as much light as you need. So lighting a person with jet black hair will need a little more lighting than a subject with white blond hair.
I believe that studio lighting shouldn’t be a prescriptive process anyway, for me its about lighting what’s in front of you at that moment, getting the best from the subject, rather than trying to use a ‘one size fits all’ set up, that’s just not possible.
As you will see, when you shoot Low Key and use some of the techniques I’ve outlined, the process is definitely not a prescriptive one and can take time as its very touchy feely stuff. As you will find, even the subtlest changes can make a huge difference, but the results you can achieve can be fantastic, especially shot in black and white.
I hope that you enjoy shooting Low Key, not just the techniques, but the whole experience. It is a very ‘touchy feely’ process as I said, different for each subject you shoot. Hopefully the techniques I’ve outlined will give you a head start to achieve some great results. All the images shown here are straight out of the camera, without any editing to show you what’s actually possible. I hope that you’ll be converted to shooting Low Key and using those superb accessories that really allow you to use your artistic eye in the studio. Have fun!
If you have any questions about Low Key photography, or on any other lighting topic, please contact Steve via steveaves1@tiscali.co.uk

