Part 4: Studio Flash
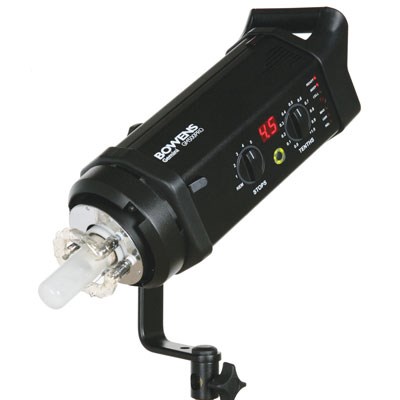
Studio Flash is the last group of lighting and to many, from the emails I receive, perhaps the most baffling. I’ll try to unravel the mysteries of it by starting at very the beginning. Studio flash has been around since the late 60’s thanks to people like the inventor, Ken Bowen, the founder of the UK company Bowens. Since those early days, when heads were twice as large, twice as heavy and half the power, things have moved on and it’s all due to technology.
With the invention of smaller electrical components, especially capacitors, today’s flash heads are smaller and lighter than they have ever been. Before we look at what’s available lets look at the way flash heads work. Quite simply, flash heads store power and then release it through a small flash tube. The power is stored in those capacitors I mentioned and because they've got much smaller, recycling times have got much quicker and flash heads can now be made much smaller too.
When a flash head is plugged in and switched on, the capacitors store the power. That power can then be released through the flash tube in one go, at full power, or if the power is turned down, then the output will be less through the tube. Most flash heads have a five stop power range, that means the power can be regulated from full to around 1/16th power on most models.

The beauty of flash heads is that they have modelling lamps, usually in ratio to the flash tube, which means that what you see is what you get. This feature enables the photographer to ‘model’ using the lamp to get the right amount of directional light onto the subject. Modelling lamps are important and they do vary - the more powerful the lamp, the easier it is to see in the studio. Bowen’s flash heads always use a 250w Halostar, one of the brightest available.
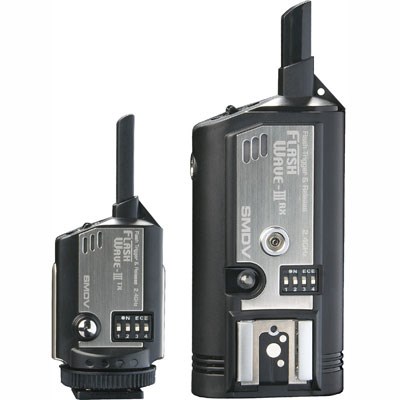
To fire a flash head is very straight forward, they all come with sync leads, a cable that connects from the camera’s coax socket to the flash head. Some cameras don’t have that socket, which is why a simple hot shoe adaptor can be added. Firing other flash heads is also straight forward because they all have built in slave cells. This is a clever device that triggers the head automatically when another is fired. So you only need to trigger one from the camera, and all the rest will fire. An alternative to this physical connection between camera and flash head is the wireless trigger, such as the Flash Wave III which will allow you to fire the flash remotely.

So we've covered some of the key areas of the flash head, power, the modelling lamp and the slave cells. Lets go back to power for a moment because I want to explain how manufacturers quote them. Power is normally quoted in Joules or sometimes Watt Seconds. Both these measurements refer to the storage capacity of those capacitors I talked about earlier. It means that the larger the number quoted in Joules the more power the flash head can store and therefore the higher the output through the flash tube. Basically the higher the number the more power you get for your buck.
Key features to look out for
So far so good, I’ll come to flash tubes later, but other features worth mentioning include auto dump, proportional modelling and audible beeps -most decent models have these. Auto dump is a really important feature and you should make sure that the model you want to buy has it.
Why? Because auto dump will allow you to turn the power down and it will automatically dump, or ‘drain’ any excess power internally and allow you to shoot at the correct setting straight away. Without it you have to remember to fire the flash yourself when you turn the power down to remove this excess power.
Proportional modelling is another basic feature worth having. It means that when you turn the power up or down, the modelling lamp will do the same and again, most decent models have this. The audible beep is another feature that simply beeps when a flash head is ready to fire, very useful if you have two three or even four heads going at once.
Another key part of any flash head is the humble flash tube. Good manufacturers will always quote two things about them, the K rating and flash duration. Most flash tubes are rated at 5600K daylight, which means you can shoot on average white balance. Make sure that figure is quoted somewhere, if its not, the tube may not be daylight, which isn't good.
Flash duration is another key measurement that photographers need to know when making choices between models. A faster flash duration is always better than a slow one because even at lower powers the output will always be more consistent. Durations are quoted in 1,000th’s of a second and to achieve higher speeds, companies like Bowens use high-speed flash tubes on their more expensive models. The Bowens Pro range for instance has high speed tubes as standard to achieve the highest possible flash durations.

The one big question is: what power do I need?
Photographers are lucky these days because the sensors in today’s DSLRs are much more sensitive than film. This means that photographers can shoot with much lower power than their predecessors to get the same results.
As I mentioned at the start, think about the type of work you want to shoot (now and in the future), so think ahead. The great thing about studio flash is that a system can be built up over time. Anyone can start with a modest kit and add to it when they need to, but buying that first kit is important and making the right decision will save money in the long run.
As a rough guide, smaller 100j to 250j kits will be perfect for the enthusiast who wants to shoot portraits of family and friends. 400j and 500j are much better for shooting larger groups and bigger products. 750j and 1000j heads are getting pretty heavy weight and will appeal to professionals shooting commercial or people and fashion, etc.
I hope that gives you some idea of power, but is brand important? In my opinion, buying into a decent brand is essential. Brands like Bowens and Elinchrom have been around a long time and are the Nikon and Canon of the lighting world, though not necessarily in that order! Both manufacturers have been making high quality studio flash for decades and both use top quality components and flash tubes, vital to know from a buyer’s point of view.
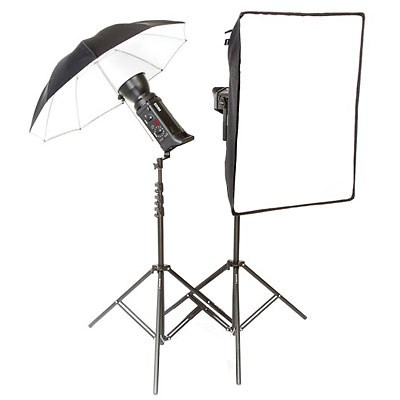
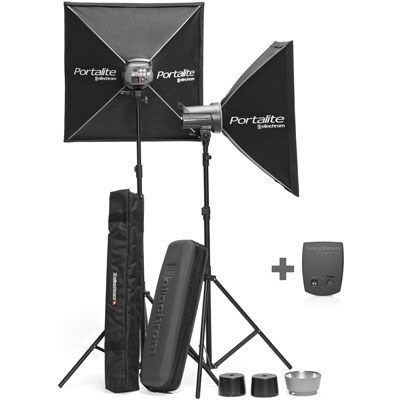
The other reason to buy into a brand is the range of accessories available. Buying the correct accessories is the key to successful studio work. Having the right tools for the job will ensure that you always get the very best results. I can’t stress the importance of accessories and as most flash kits only come with brollies or soft boxes, be prepared to keep some of your budget aside to buy a few extra bits and pieces.
To sum up, I would say that flash is the Rolls Royce of lighting. Because of the endless power available and the enormous range of accessories, everything can be shot with flash. From fashion to cars, furniture to portraits, there are no limits and that’s just inside the studio. Companies like Bowens developed a battery pack some years ago and it's now possible for photographers to use all their kit outside. In fact as a brand, Bowens are the only company to offer battery compatibility on all their models.

Who would buy flash?
Any serious photographer should consider buying flash, whether enthusiast, semi pro, or pro.
What are the benefits of flash?
Flash heads have daylight balanced tubes so you can shoot without the need for filters. You can shoot any type of portraiture, High or Low key, and any type of commercial work. Heads are smaller and lighter than ever, making them easy to transport and even a basic head has a decent spec. The range of accessories makes buying flash such a good proposition and don’t forget you can always start small and build up your system over time.
Are there any downsides?
I don’t think so. You may think cost is an issue, but a decent starter kit is about the same price as some fluorescent kits, or a pair of high-powered flashguns. Flash is a little more technical than the other options, but believe me it’s not rocket science and if you can find your way around a DSLR menu, you can definitely use flash!
That’s the last of the four groups in this Guide to Lighting Options series and I hope that I've been able to explain some of the benefits of each one. As I said at the start, it is difficult to compare one group with another as they all offer different possibilities for the photographer. As a further guide to buying lighting, I would like to make the following points. When buying any lighting, I know that cost is always an issue, but think long term if you can. Try to invest in a brand that has a good reputation and a wide range of accessories that will allow you to expand over time, even if you have to make do with a slightly lower powered kit to start with. It need not be a compromise as you can work a little closer to the subject to get the same results.
Most photographers I know have taken a long time to build up their systems and very few people have the money to buy everything at once. Be patient and work within the limits of your kit. Always invest in essential accessories and don’t waste money on gadgets you think might work. And finally, if you want to add to your lighting system and are uncertain about what to choose, drop me an email, or phone my colleagues at Wex, we can offer you the advice you need to make a valued decision, no matter how big or small the item may be.
You can contact Steve Aves via our web site.
You can find all links to the articles in the Wex Guide to Lighting Options below:
Part 1: Flashguns | Part 2: LED Panels | Part 3: Continuous Lighting | Part 4: Studio Flash

