New year, new camera? Whether it’s a compact, Compact System Camera (CSC) or a DSLR you’ll get much more out of it if you set it up correctly before you start using it. Here’s how you do it.
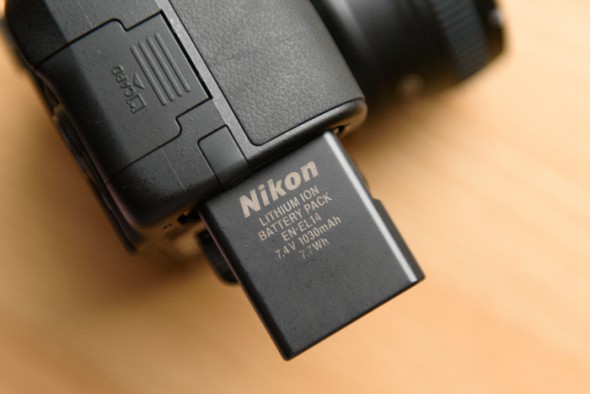
Charge the battery
The very first thing you should do is give your camera’s battery a full charge. This provides the perfect opportunity to go through your camera’s manual to acquaint yourself with its various options and controls, and also to learn how to insert the memory card and mount a lens on the camera body (assuming you’re using a camera that accepts different lenses).
Once the battery is charged, insert the memory card and, if necessary, mount a lens, before popping in the battery, making sure it goes in the correct way (if inserted correctly it should click once fully in). If you have a number of compatible lenses, use whichever is closest to hand as it’s not important which you use here and you can always change it later. Now turn the camera on.
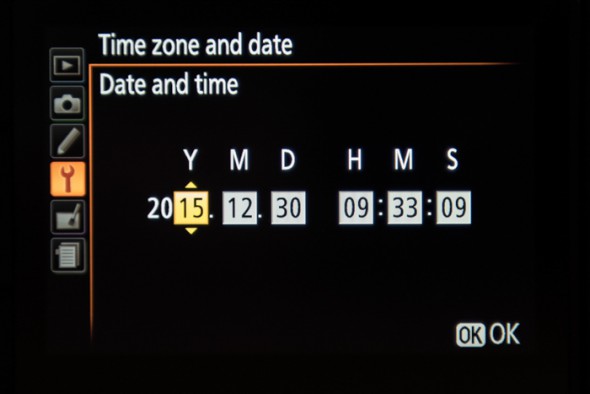
Set the language, time and date
You camera will probably now prompt you to set the language as well as a time zone and date (although if it doesn’t you can find this in the tools/maintenance menu, which may be marked by a spanner or cog). It’s a good idea to set the time and date accurately as this information will be stored in the metadata of any images you take. This is information about the image that is attached to every shot you capture, which allows you to see exactly when you took a specific image. This also contains plenty of additional information such as your exposure settings, and all of this is viewable when reviewing images on your camera and on a computer in most image viewing and editing programs.
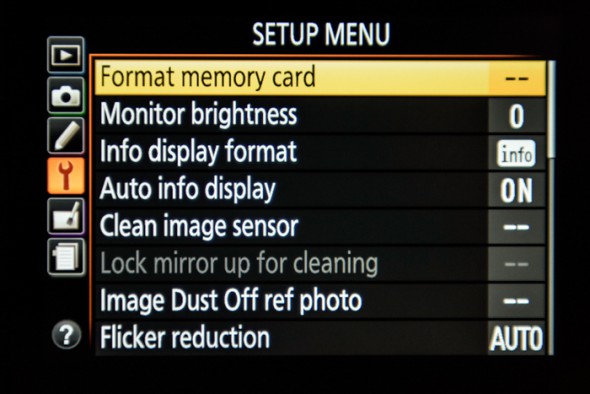
Format the card
The next step is to format the memory card; this introduces the card to the camera and sets up folders so that your images and videos are stored correctly. The Format option will be in the tools/maintenance menu. If you’re not using a new memory card, be aware that this process will delete any images or other files that may be on it, so make sure you have copy of these elsewhere if you need them.
It’s likely your camera accepts SDHC or SDXC cards. If your camera doesn’t allow you to format the card, turn the camera off and take the card out to check whether the small tab on the left-hand side is in its uppermost position. When it is moved down the card is write protected, meaning that no changes can be made to the information on it. Flick the switch up if you need to and carefully reinsert the card before turning the camera on and formatting it as before.
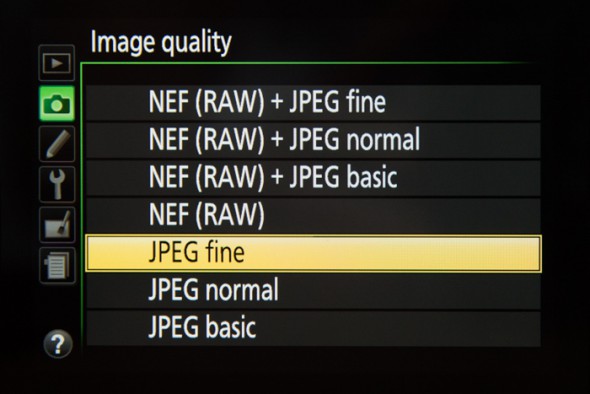
Image quality
Once the card is formatted you’re ready to select your image settings. Although you should be able to use your camera straight away on its default settings, it’s worth taking a minute to check that everything is set to your liking.
Find the menu with options for Image Quality and Image Size; this should be one of the first ones you come to. Under Image Quality you should have the option to store images in theRaw and JPEG formats, or a Raw + JPEG option that combines the two. If you want images to use straight away select the highest-quality JPEG option. The other JPEG options will typically allow you to store more images on the memory card at the expense of image quality.
If, however, you imagine you will want to process your images later on on a computer, select the Raw option. This isn’t recommended for beginners, but your camera will come with software that allow you to do this, and you may want to learn this in time. If you’re using a memory card with a high storage capacity (such as 32GB or 64GB), you may wish to select theRaw + JPEG option and revisit your Raw files once you’re ready to take more control over your image processing.
But what is a Raw file?
A Raw file is analogous to a film negative in that it contains the basic information about the image but it’s still subject to processing to determine things like colour, contrast and so on. Some cameras allow you to process Raw files in the camera itself, although most photographers choose to do this on a computer using a program such as Adobe Lightroom, DxO Optics Pro or similar. This gives you the opportunity to create images exactly to your liking and it’s a great option when you want to save images in the highest possible quality for archiving or when printing enlargements, although most cameras capture perfectly decent JPEGs so you may find this unnecessary for everyday images.
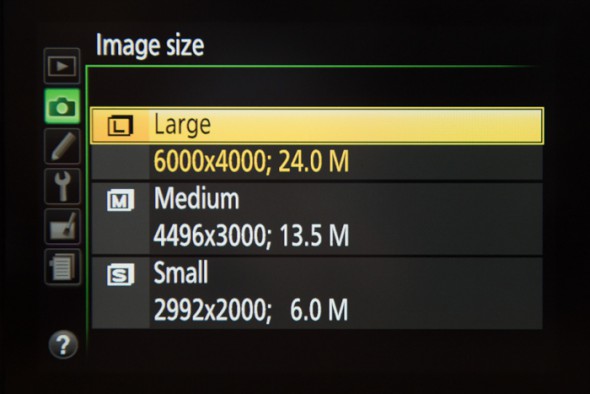
Image size
The next step is to select Image Size – ie the number of pixels used to save your images. Unless you’re using a memory card with a limited capacity, it’s a good idea to select the largest option, which should be the default setting. Not only will this allow you to enlarge your images with ease and provide more scope for cropping, but it will also help to capture finer details.
Note: This option may not be available if you’ve selected Raw-only shooting, as it will default to the largest size.
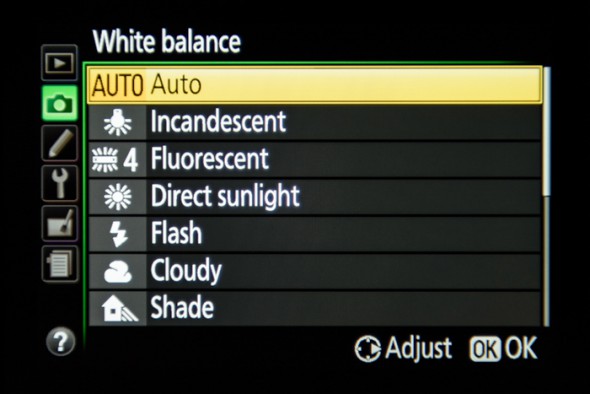
White balance
Your camera’s White Balance system ensures that colours in your images are faithful and that there are no casts. The default option here will be Auto (sometimes marked AWB), and it’s a good idea to leave this on this setting for general day-to-day images. If you’re shooting indoors, perhaps in tungsten or fluorescent light, your camera may struggle to render the scene accurately. In this situation, try switching to the option that matches the light source and see whether this helps, but remember to turn it back to Auto when you start shooting in different lighting conditions.
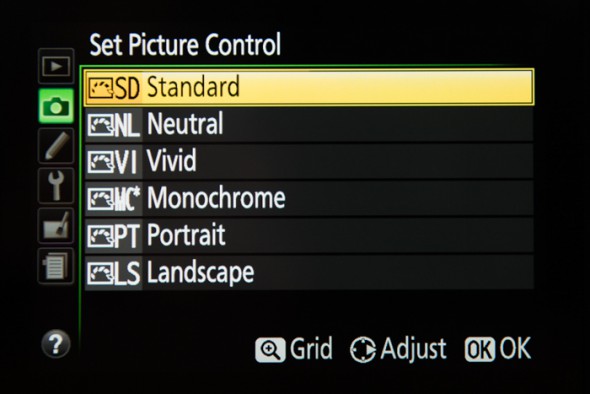
Colour
This may be titled Picture Control (Nikon), Creative Style (Canon) or something else, but all do the same thing which is to determine how the colours in your images appear. There should be a Standard option for general purpose use. The Vivid setting, boosts saturation and sharpness, and can be great for landscapes and you may want to use the Portrait setting for people shots as it aims to make skin tones more attractive and warmer. Some more obviously creative options are available too, including (monochrome) Black-and-white and and Sepiaoptions among others.
Change this as you feel you need to, but it’s a good idea to keep it on a standard or neutral option for everyday images. Bear in mind that if you capture Raw images you’ll be able to change colour options later on, but if you capture JPEGs on their own you won’t be able to change, for example, a black-and-white image into a colour one. Some cameras won’t let you change colour settings when shooting Raw images on their own, but you can change this when editing images later on.
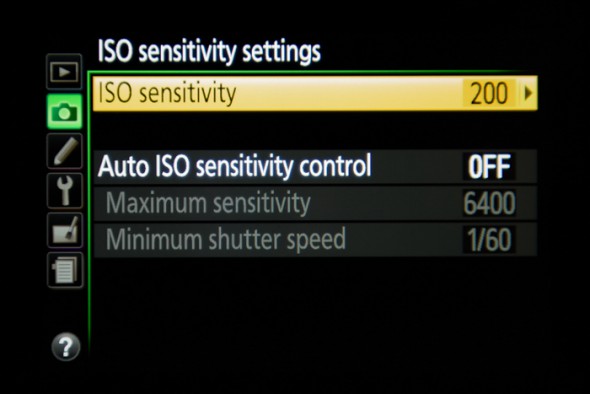
ISO setting (sensitivity)
Your camera’s ISO setting refers to its sensitivity to light. As a general rule, you should use the lowest setting possible, typically ISO 100 or ISO 200, for the best-quality images, and save the higher settings such as ISO 12,800 or ISO 25,600, for low-light situations. It is, however, awkward to adjust this before each shot, so while you’re still getting used to it the best option is to set it to the Auto ISO setting as this will instruct the camera to automatically use the most appropriate setting for each image.
If you do use the Auto ISO option, there may be the further option to limit the ISO setting available to the camera, such as to ISO 3200 or ISO 6400. The highest ISO settings can produce grainy images with coloured speckles (known as image noise) and some photographers like to block off this part of the sensitivity range so that the camera doesn’t use it. This is something you may want to change over time, once you’ve a better idea of your camera’s image quality in different situations, so don’t worry about imposing any particular limits here for the time being.
Focus
Today’s camera’s have plenty of focusing options and this can confuse some people. These are divided into two categories. The first set of options concern the focusing points, or areas, available to you for each image. If there is an Auto option this will typically use all the points to determine where best to focus. You can also set this to a single-point AF mode whereby the camera will just use one point of your choice, perhaps in the centre, to one side or at the top or bottom of the frame. This is great when you want to always focus in one place, such as when your subject isn’t moving. It’s best to consult your camera’s manual here as the labelling and availability of these options varies widely between cameras.
The other set of focusing options concern whether your camera’s autofocus system focuses once on a subject or continuously to keep track of a moving one. There will also be the option here to disable the autofocus system so that you can manually focus the lens using a ring or another control. The first of these is the default option, usually titled AF-S, and it’s safe to leave this on for general day-to-day shooting.
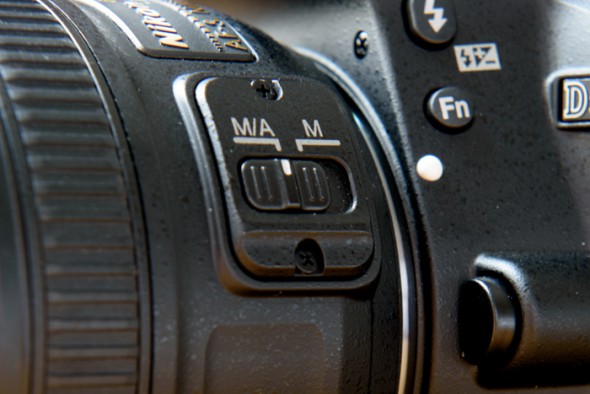
If you’re using a lens with physical switches, make sure the focusing switch is set to AF orM/AF and not M. M is the manual focus option, so the lens will not autofocus when set to this mode. There may also be an AF / M switch on the camera’s body which tells the camera whether to use autofocus or manual focus – make sure this is set to AF for general use.
Finishing off
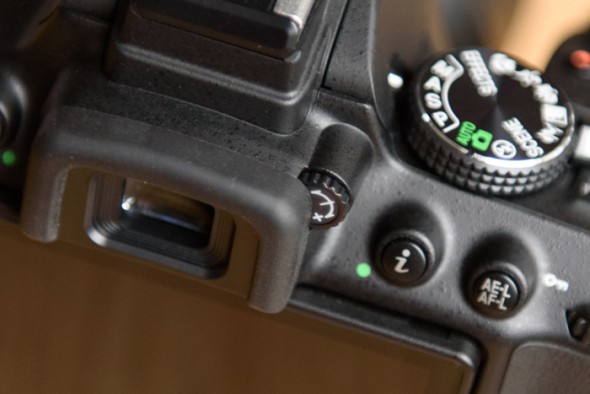
If your camera has a viewfinder it may have a small wheel or switch next to it. This is the dioptric adjuster and it controls the focus of the viewfinder so that it can accommodate different eyesights. Turn this until the information in the viewfinder – the focusing points and the various figures – appears as sharp as possible.
If your lens has a switch for image stabilisation, make sure this is set to the standard position, which may be marked ON or Mode 1. This is the best setting for general use. If your lens doesn’t have this, you may have to enable image stabilisation through the camera’s menu system.
Photography for beginners
Want to know more? Watch our photography for beginners video series and subscribe to our YouTube channel for more guidance and inspiration:

