If you’ve only got room in your life for one filter, it should definitely be a polariser. Kirk Norbury explains why polarising filters are so useful, and how to get the best results from them…
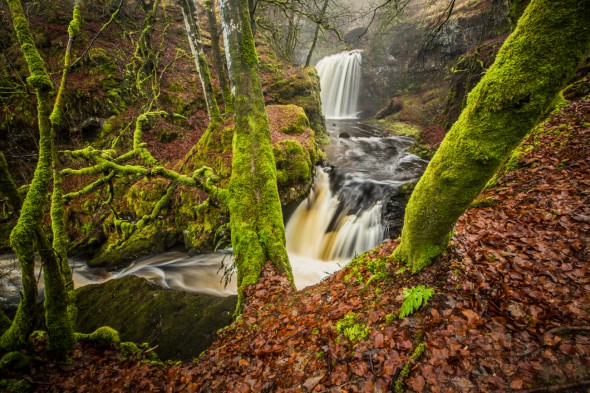
Dalcairney Waterfall, Scotland
With editing software getting better and better, there’s less need to use filters than there once was. However, there’s one filter that you still absolutely cannot leave home without, and that’s a polarising filter. I personally feel that a polarising filter, or polariser, is one of the most essential in a photographer’s backpack. In this article, I’ll go through how to correctly use your polarising filter, and how to get the most out of it.
A polariser can reduce reflections from surfaces like water and glass, and can be used to make a scene much more vivid by darkening the sky and bringing out the clouds. It can also help reduce haze on a sunny day.
The best type to use is a circular polariser, which easily attaches to the filter thread on the front of your lens. A circular polariser is made up of two rings that rotate independently of each other, so when you put it on all you need to do is rotate it clockwise or counter-clockwise to change the amount of polarisation.
Polarising filters work by blocking certain types of light wave from entering the lens, and rotating the polariser alters which types of light waves are allowed to pass through, and which are not. This is why a blue sky will appear to be darker and clouds look more defined. Circular polarisers work especially well on sunny days as this when their effect is most apparent.
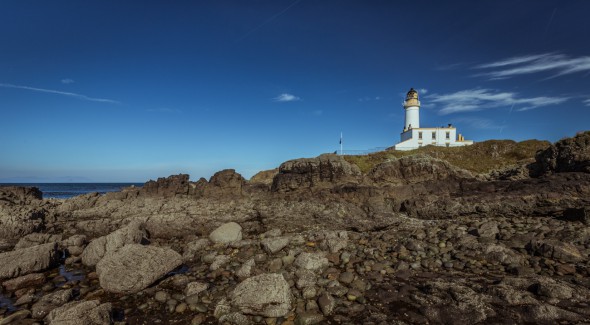
A polariser has added drama and richness to this image of Turnberry, Scotland
How to use a polarising filter
After you have attached the filter to the front of your lens, the first thing you’re going to need to do is position yourself at a 90-degree angle to the sun, i.e. have the sun either on your left or right side. If the sun is behind or in front of you the filter’s effect may not work and the brightness and colour of the sky may look uneven.
Once you have set up your shot, you then need to rotate the filter until you are happy you’ve got your desired look. As well as using the viewfinder to see the effect you can also see it change on the screen on the back of your camera (assuming your camera has Live View).
The effects of a polarising filter
1. Removes reflections
A polarising filter is a great tool for removing reflections and isolating elements that are wet, underwater or behind a window. So if you are photographing calm water you will be able to see what is under the water a lot more easily than if you weren’t using the filter.
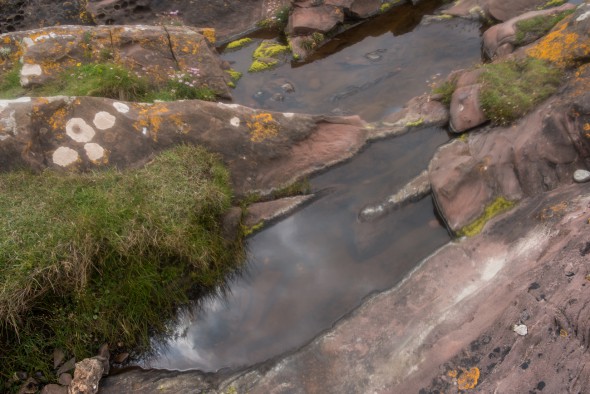
Image taken without polariser
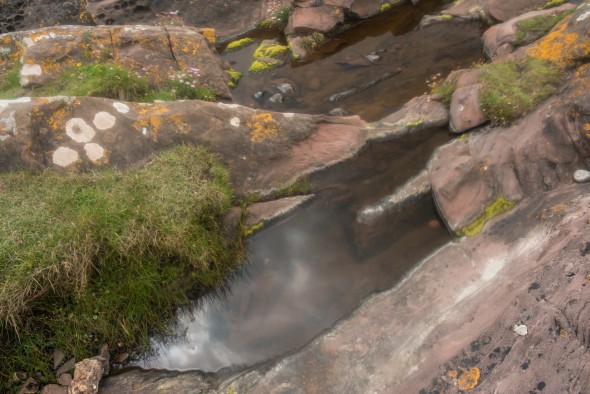
Image taken with polariser
2. Increase in colour saturation
When the reflections and haze in the scene are reduced, certain elements will look more a lot more colourful. You will notice this the most in blue skies, leaves and other foliage.
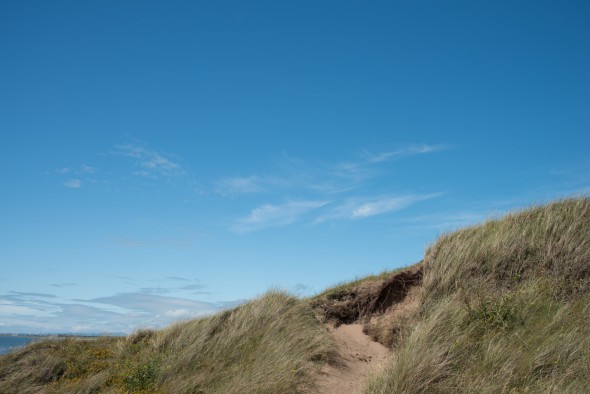
Image taken without polariser
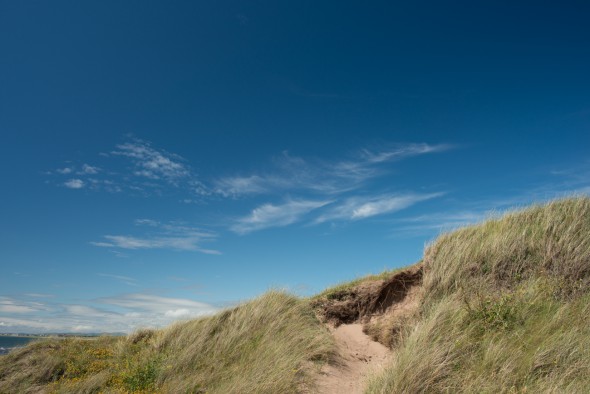
Image taken with polariser
3. Decreases contrast and haze
Due to polarisers reducing direct reflections, you will likely observe a loss in contrast. This is great for capturing a higher dynamic range in a scene. You will first notice this happening to the sky in the image, as the polariser will slightly darken it.
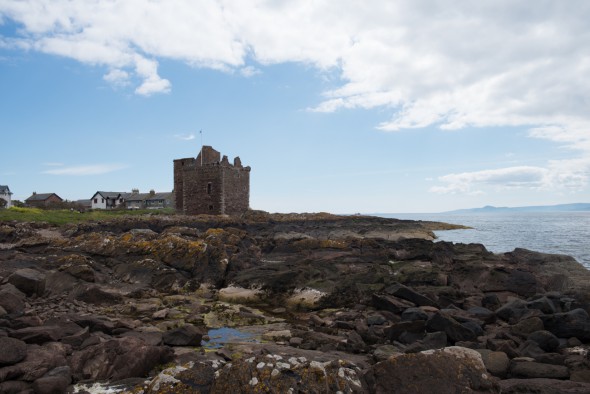
Image taken without polariser
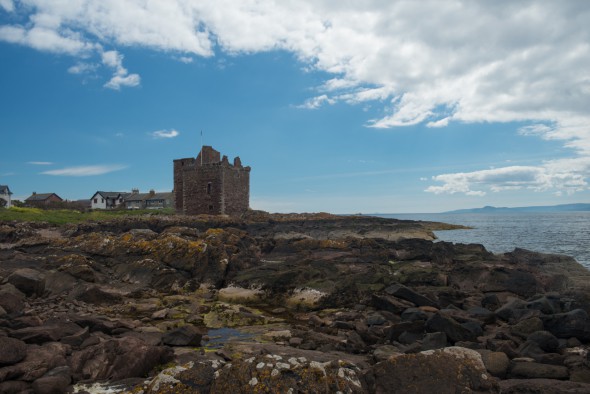
Image taken with polariser
Another thing a polariser can do is help deal with haze. When shooting distant elements like mountains you will often see haze adversely affecting the image. Using a polariser will help eliminate this.
Things to remember
- Polarising filters are very handy but they are not always needed. When the sky is cloudy the effect of the filter is very minimal, so much so in fact that I wouldn’t even bother using it on overcast days.
- A polariser will also darken the scene by around 1.5 to 3 stops, so your exposure time will be longer. This is great for shots where you need a longer exposure, as you won’t need to use a neutral density filter.
- When using certain wide-angle lenses you may see the corners darken due to the edges of the filter creeping into the shot, creating a vignette. If this is the case with one of your lenses then I would highly recommend buying one of the more expensive “thin” polarising filters.
- Some cheaper lenses rotate their barrels when auto-focusing, which will also turn an attached polarising filter and thereby change its effect. If you use a lens that does this then I would highly recommend manually focusing before you adjust the filter.
Click here to shop polarising filters
I hope this article gives you some insight into how best to use these amazing filters. Once you get used to using them and getting the most out of them you will see why it is so beneficial to have them in your camera bag.
Creative experimentation is half the fun of photography, and a polarising filter is a great reason to get out with your camera and see what you can do differently.
About the Author
Kirk Norbury is a nature photographer and cinematographer based in Ayr, Scotland. You can find out about the workshops he runs and view more of his work on his website.

