Day-to-night time lapses are incredibly striking, but tricky. Kirk Norbury shows you how to pull them off
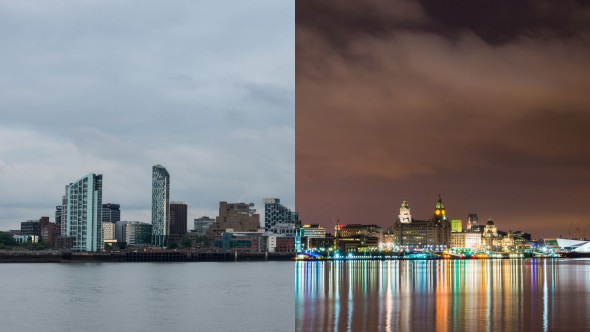
A time lapse showing the transition between these two states can make for a striking visual. All imagery by Kirk Norbury
Time-lapse videos have become more popular over the last few years, and with more and more people producing great time-lapse footage, there’s more and more need to create something dramatic if you want to separate yourself from the competition.
If you have experience creating time-lapse videos and want to take your skills to the next level, a day-to-night time lapse is the best way to do it! There are a few different ways to create a time lapse that transitions from the bright of the day to the darkness of night, but in this article I’m going to go through my process that I find works best for me.
Gear needed:
- DSLR or CSC Camera. Any camera will do as long as it can shoot in manual mode.
- Lens. Any lens will be fine, the choice of lens really depends on the scene you’re shooting. I tend to work with lenses from 14mm to 200mm.
- Tripod. You want a strong tripod that isn’t going to blow away.
- Intervalometer. You need an intervalometer so that your camera can take shots continually without you touching it.
- Slider. For that added wow-factor, a slider can really make your shot stand out, but isn’t completely necessary.
- For software, you will need to be using Lightroom and LRTimelapse to process the files.
Controlling the Exposure
As day turns to night, the light levels will change dramatically. This means there is no chance of keeping the exposure the same for all the images, as you likely would if shooting a standard time-lapse. Your exposure will therefore need to be changed to compensate for the amount of light available.
There are two ways in which you can do this – shoot in manual mode and change the shutter speed at different moments, or shoot in Aperture Priority mode and let the camera work out the exposure for you. Both work very well combined with LRTimelapse, but shooting in manual mode works best, especially when shooting the night sky.
Process:
- Put your camera onto a secure tripod and lock everything down to reduce any camera shake.
- Attach an intervalometer to your camera (some cameras have it built in) and dial in your interval settings. The interval can be whatever you want and can vary depending on the scene and what lens you’re using. For day-to-night time-lapse I tend to set the interval higher than 7 seconds, as the exposures will grow longer throughout the time-lapse and you don’t want your shutter speed to be longer than your interval.
- Put your camera in complete manual mode, as you don’t want the camera to judge the exposure for you.
- Check your exposure for blown-out highlights and manually focus the lens to make sure the final image will be sharp.
- If you’re using a DSLR, make sure to cover the viewfinder, as stray light leaking through could change the exposure result in flickering. There’s usually an eyepiece cover attached to your neck strap.
- Decide whether you’re going to shoot in manual or Aperture Priority mode and set the camera’s exposure.
- Take a test shot to see if you’re 100% happy with the image’s exposure, composition and focus.
- Think about how many shots you want to take. In the UK the standard frame rate is 25fps so to get 10 seconds of footage you will need to take 250 images. I tend to take around 400-600 as this gives me more room for editing.
- Now I personally like to change the shutter speed myself. So I tend to watch the light meter on the top of my camera and when the line begins to move away from the centre I will then adjust the shutter speed between the interval and the next shot. Try to be as gentle as possible when doing this to prevent any camera movement.
Editing and post-processing
The editing process can take a while, but is well worth the time. I use Lightroom and LRTimelapse to edit my footage, as I find it be the best and most reliable software available.
Once you’ve got all of your images, you want to then import them into their own folder in Lightroom. Keep the images separate from your other images in your catalog, as it can confuse LRTimelapse if everything is in the same folder. Below is my process for editing a day-to-night time-lapse sequence.
Process:
- After the images have been imported into Lightroom, open LRTimelapse.
- In LRTimelapse, find the folder with all the images from the sequence.
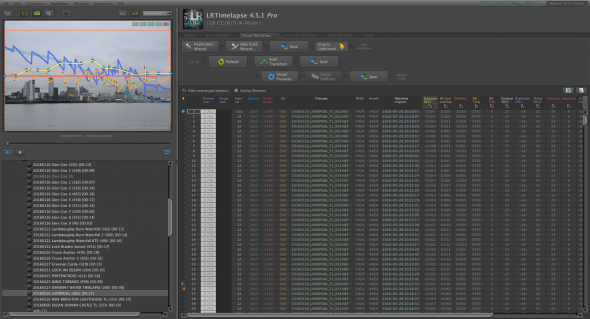
- After it has read the files, create some keyframes for editing. For day-to-night time-lapses I find it best to do quite a lot of these, due to the frequent changes of exposure.
- You then click the “Holy Grail” and adjust the gold line so it’s around the middle of the preview image. Once happy, click “Save”.
- Return back to Lightroom; select all the images, right-click and choose “Read Metadata From Files”
- Quite a few images will now have ratings, the keyframes you selected earlier are given a rating of 4 stars. To isolate them I click “Attribute” > “4 Stars”. Do not edit any images that don’t have 4 stars.
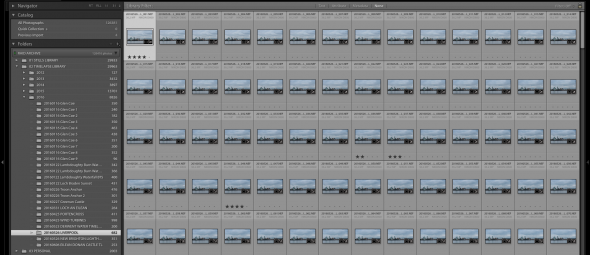
- Next you’ll need to edit the first image anyway you like. When finished copy all the settings over to the next image and then adjust that image to your liking. Complete this process until you reach the very last image.
- Select the edited images > right-click > “Save Metadata To Files”
- Now return back to LRTimelapse and click “Reload” > “Auto-Transition” and then “Save”. LRTimelapse has now created a smooth transition between all the files and has saved this information to the metadata.
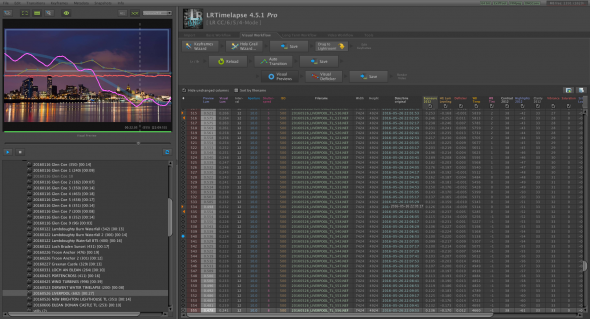
- If using the “Basic Workflow”, you can now return to Lightroom, select all the images and load the metadata from the files like you did earlier.
- You can now create a video! Select all the images and click “Export”
- LRTimelapse has its own export commands, which can be seen below. I tend to use the 4K JPG option as it keeps the file size down but can still render a high quality video.
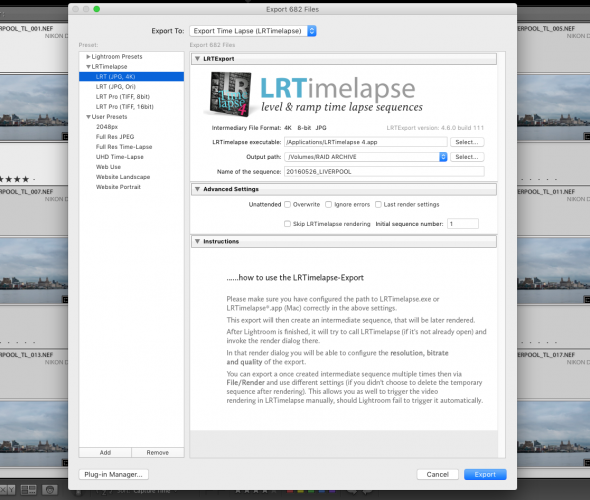
- When the export is completed, LRTimelapse will automatically run and a dialogue box will pop up asking how you would like the video to be rendered, i.e. 4K, 1080p etc.
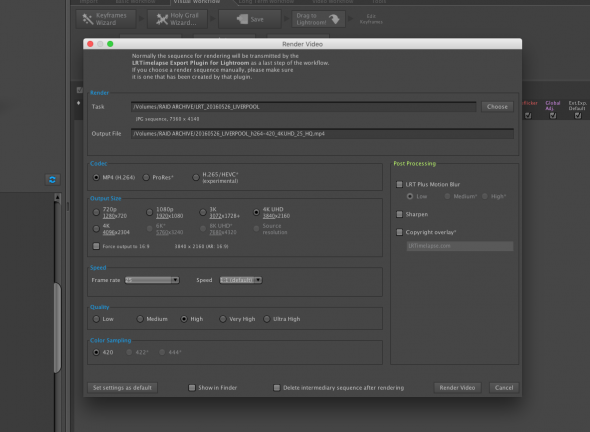
- Once happy with your settings, click “Render Video” and that’s you done!
LRTimelapse requires you to pay if you want to use all of its features, but does offer a free evaluation version which allows you to use most of the features available. The only drawbacks are that you can only edit a maximum of 400 images, you cannot export the video at any resolution higher than 1080p, and a few other locked features that are mainly related to exporting.
I highly recommend LRTimelapse to anyone interested in time-lapse photography, just because of how powerful it is. Though I would also recommend watching a couple tutorials on using it can be a little confusing at first.
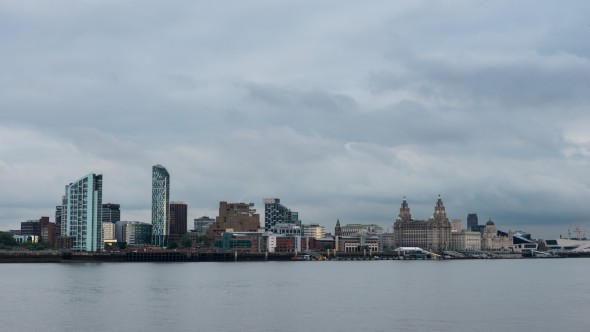
First frame
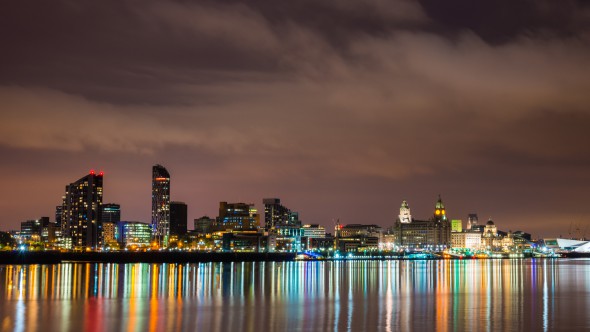
Last frame
Conclusion
Day to night time lapses can be a lot more difficult than your standard time-lapse sequences, as they can quite easily go wrong and they also take a lot more editing to get right. However, the only way you’ll get better is by practising as much as possible. Be patient, and trust the software. You won’t fully appreciate the process until you see the finished video and realise how incredible day-to-night time lapses look! Take a look at mine below...
About the Author
Kirk Norbury is a nature photographer and cinematographer based in Ayr, Scotland. You can find out about the workshops he runs and view more of his work on his website.

