We’re well into spring and there are plenty of photographic opportunities and challenges to tackle. In this article, Sarah Howard shows us how to photograph bluebells.
In English folklore the bluebell was said to call fairies to their meetings; there’s certainly something ethereal and luminescent about a sea of spring bluebells covering a woodland floor. The sight and scent is one of the most magical and intoxicating experiences nature has to offer, and it’s hard to resist the temptation to rush out to capture them on camera. Before you do, though, there are a few things to bear in mind. As beautiful a subject as they are they are not always easy to photograph. The following pointers will hopefully help you to capture them at their finest.
Planning and timing
As always, planning your photographic shoot will pay dividends. Bluebells can flower anytime between mid-April and mid-May so keep your eye on any local areas of woodland and watch the newspapers and photographic forums closely. If you go too soon they will be patchy and not at their best, but if you go too late the chances are they will be drooping and possibly trampled. If possible, go after it rains as they will look perky and the greens will be vibrant, while water droplets on the leaves will add interest.
Bluebell woods can be photographed in most conditions, although some are better than others. The time of day and the type of light will have a bearing on the techniques you use. Sunny days can give lovely sun-dappled woodland floors, although this presents problems with contrast which must be carefully controlled. A bright, but overcast, day can be ideal and makes for much easier exposure (and you’ll also get a more natural ‘blue’ colour too). The time of day is also an important consideration; misty mornings can add mood and give a soft, muted effect which can work well, whereas shooting in the evening will provide a warmer light with long shadows, although this can give the flowers a more purple look. Midday shooting, which offers a slightly colder light, suits the flowers well.

Equipment
Using a tripod will not only allow for longer exposures but it will also aid composition by slowing you down and give you time to step back and re-evaluate your image before releasing the shutter. Make sure to also use a cable release, or the self-timer option on your camera, to release the shutter as this will help prevent camera shake.
A wideangle lens will allow you to capture a large swathe of the carpet but it does also tend to have the effect of spreading the bluebells out and reducing their impact. A telephoto lens, such as one with a 70-200mm focal length, has the effect of shortening perspective and compressing the view, which makes it look like there are more bluebells than there actually are. This can be used to good effect in more patchy bluebell woods to give the impression of a thicker carpet, while also seemingly bringing trunks closer together. Take several lenses and experiment; try some macro shots and photograph individual flowers (but watch for movement caused by wind) or, if you have one, try a fisheye lens. Try to come up with an image that is different to one you’ve seen before.

Adding a circular polarising filter to your lens will remove any glare on the foliage and flowers from moisture or sunlight reflections. In doing so, it will saturate and add depth to the blues and greens in the scene. Remember that a polariser works best if you are at an approximate 90degree angle to the sun, so make sure you check this if you intend to use one.

Technique
Don’t just point and shoot. The scene before you may be beautiful but to create a really good image you need to think about your composition. It’s easy to be distracted by the stunning blue carpet before you and to ignore the clutter often associated with a woodland floor, such as fallen branches and brambles. Look carefully as you compose and seek out the tidier areas of woodland.
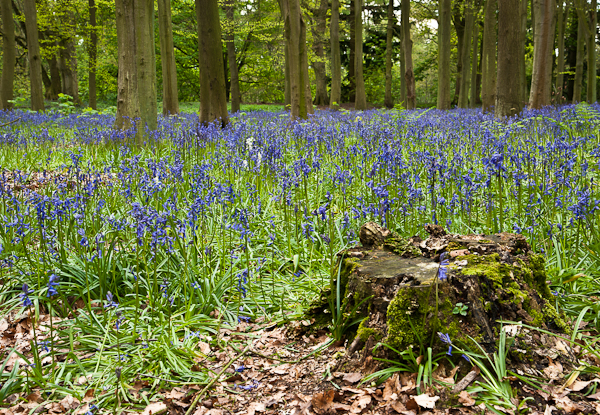
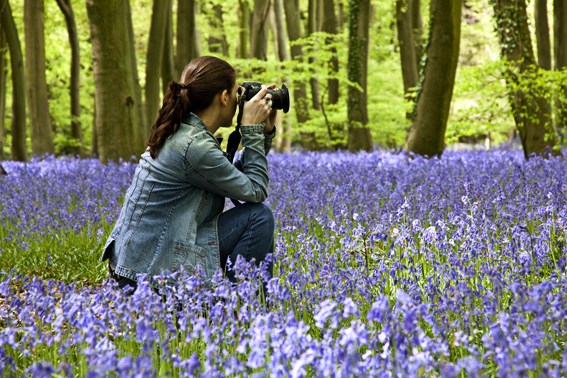
Place trees carefully in the frame and use the rule of thirds to guide your composition. With wider shots, use lead-in lines to draw your eye into the scene. Try shooting from head height to maximise the view of the bluebell carpet, although adopting a low angle (at the same levels as the bluebells) can help give them stature and create an interesting alternative viewpoint. As well as wider scenes, force yourself to focus on the smaller details too. Moss-covered tree stumps or fallen branches surrounded by bluebells can also be lovely.

When out in the woods, treat bluebells with respect by keeping to the footpaths and resisting the urge to pick them. As well as being illegal in the UK (without permission from the landowner), it’s inconsiderate and spoils the view for others. It’s easy in the pursuit of your image to get carried away, and although it is often hard to avoid standing on one or two bluebells to get the image you want, you should nevertheless try to minimise this.
Bluebell woods can be very contrasty in bright light, so it’s worth bracketing your exposures to make sure you get it right. The histogram can be very useful too; this shows you the range of tones in the captured image (i.e. the range from the darkest to the lightest tones). There’s no such thing as the perfect histogram as it depends on what you are photographing, but the most important point is to ensure that none of the shadows or highlights are clipped. You’ll notice this happening when the information in the histogram appears to be extending completely upwards and spilling over the left or right sides, although if you have a highlight indicator function on your camera this will flash to warn you of the same thing.

If you are shooting in Raw at your camera’s base ISO, try ‘exposing to the right’, where you adjust the exposure to maximise the tones appearing on the right hand side of the histogram. The camera sensor can record much more detail in the brighter parts of your image than the darker parts, so, depending on the lighting conditions, you may find you need to slightly overexpose your images in order to fully take advantage of your sensor’s capabilities. This will allow you to retain detail in the shadows while also minimising noise, but make sure you don’t overexpose so much that you start to lose highlight detail. The images will most likely appear a bit overexposed on the preview screen but you can easily adjust the exposure in post-processing to the level you observed at the time.
Setting the white balance to Sunny (around 5500K) will avoid bluebells in direct sunlight appearing too purple, whereas the Cloudy setting (around 7500K) will warm the whole scene up. Shooting in Raw will also allow you to address any colour balance issues afterwards in post processing.
Final tips
Try shooting into the sun, although do this with care and only when the sun is low. By shooting into a very low sun at the beginning and end of the day you can get some interesting effects with the sunrays penetrating the tree canopy. Make sure you place the sun behind a tree trunk and get some strong shadows radiating out across the image. The effect of backlit flowers can be stunning although be careful of flare and ensure you have clean lenses.
You can control depth of field by changing your aperture and subject distance, and you shouldn’t be afraid to experiment with either. For a wideangle lens focused around a third of the way into the scene, an aperture of between f/8-13 will usually enable you to get everything from the front of the image to the back in focus, although you should experiment and see what works best for the specific scene (maybe even using hyperfocal focusing). Try some images at f/2.8 or f/4, focusing carefully on the part of the image you want to be sharp and letting the foreground or background fade out. When using a macro lens and shooting close up, depth of field is drastically reduced and extra careful focusing is required (live view is often useful in this instance). Another completely different technique is panning – either handheld or on a tripod – which can be used to create an impressionistic effect.
Britain contains more than half the world’s population of bluebells and they have inspired generations of poets, so get out there and capture their beauty. They only come once a year and don’t last long!
Do you fancy joining Sarah on one of her landscape workshops? Click here for more details!
About the Author
Sarah Howard is a professional travel and landscape photographer who runs photographic workshops around the country. For more information visit her website.

