Want to know how light painters get those amazing spinning orb effects? Claire explains all
Orbs are fantastic fun to light paint and fairly simple to do. There are few different ways to paint orbs, but the most popular is to use LEDs on a wire. In this post, I’m going to show you how to make a basic orb tool easily within 30 minutes, and pass on some tips on how to spin a orb and get it straight!
Make a Basic Orb Tool
What you will need:
- Battery-operated fairy lights (white or one colour)
- Duct tape or electrical tape
- Scissors (only needed if using electrical tape)
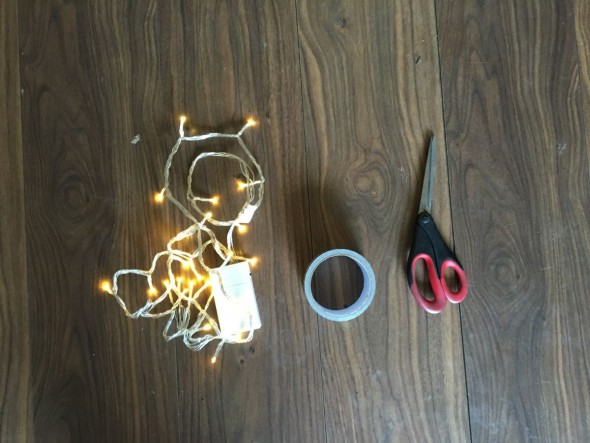
Let’s get started!
Step 1 – Preparation
- Clear yourself enough space (I made this one just sitting on the floor)
- Ensure that your fairy lights have batteries in
Step 2 – Gathering the lights
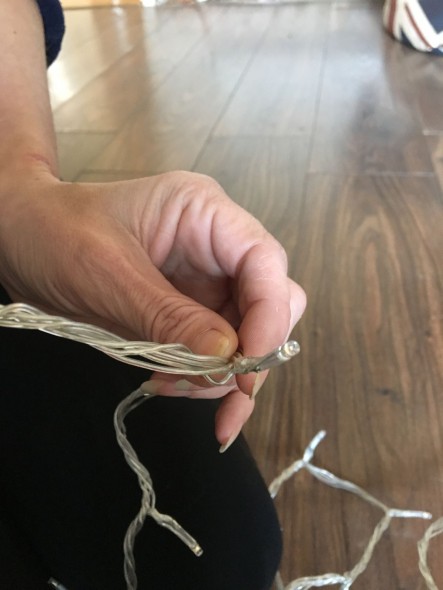
- Starting at the furthest light from the battery box, start gathering the lights together; for best results I recommend gathering about ten lights. Hold them all in your hand and try to keep them as neatly together as possible.
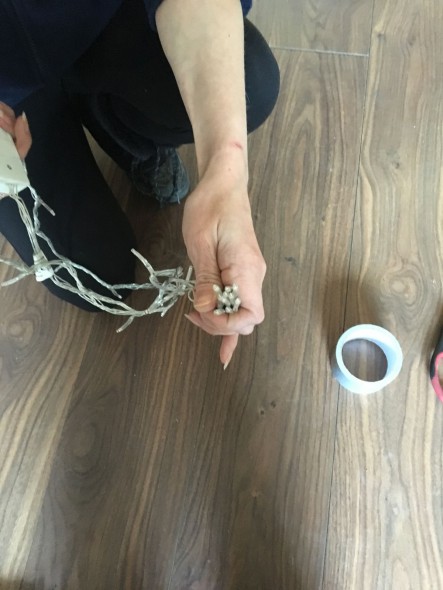
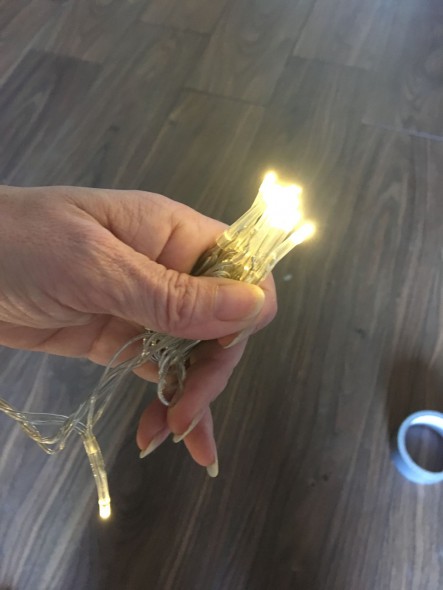
- When your lights are gathered, start wrapping the wire that’s under the lights with duct tape, ensuring you cover all the wire gathered.
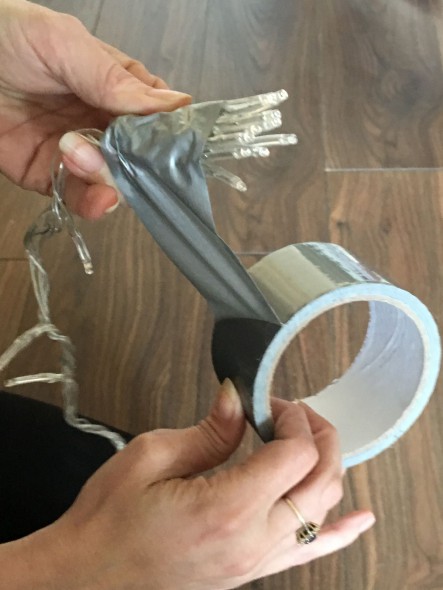
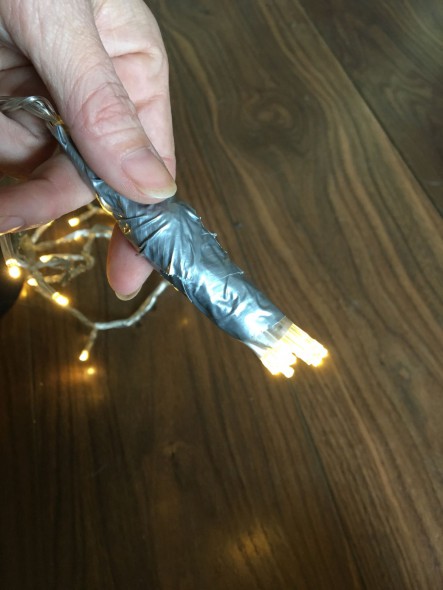
You are now over halfway there!
Step 3 – Covering the spare LEDs
You’ve now made the part that’s going to make your orbs, so it’s time to black out the spare LEDs on the wire. At this point, turn your lights on.
Now, taking each spare LED in turn:
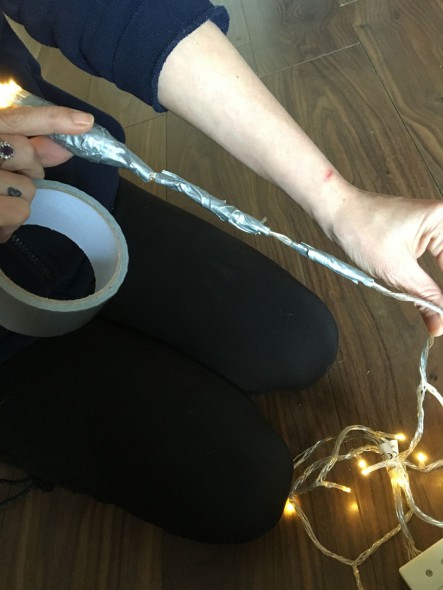
- Fold back each spare LED so it is flat against the wire. Now tape down the light to the wire, covering the whole light several times. This is where having your lights on comes in handy, so you can check for light leaks and keep taping until no light from the taped LEDs is escaping.
- Continue for each LED until they are all covered and no light is leaking from the tape.
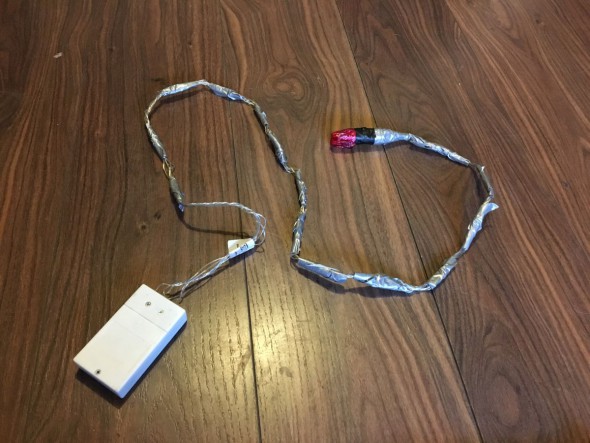
Quick Tip #1: If, like me you have purchased white lights, you can easily adapt them to be pretty much any colour using coloured cellophane as I’ve done above. This can be purchased from all good arts and crafts shops, although Quality Street wrappers also work well.
Once you have made the basic orb tool, you can adapt it. I had an idea for making a double orb tool whilst writing this article, it took me 20 minutes and it worked! It’s all about experimentation, that’s part of the fun.
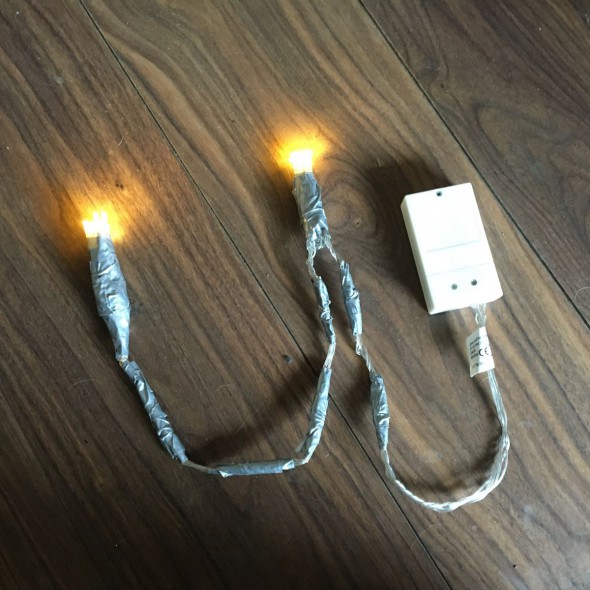
Now you have your orb tool made its time to test it!
Light painting orbs with your homemade orb tool
Spinning orbs is quite simple but can be more difficult to get the perfect round orb, the more orbs you spin the more perfect you seem to want them, two years of light painting and I’m still not happy with mine every time!
As mentioned earlier I have been very lucky that I have so many light painting friends that are very patient and have kindly spent a lot of time teaching me and passing on their tips, there are no rights and wrongs to light painting but the following are some of the tips I’ve been given to help get those orbs straight:
- This might sound rather obvious, but find somewhere as dark as possible. The darker the better!
- Stand facing your camera, holding your orb tool in your hand (always hold the wire in your hand you are going to spin with and the battery box in the other. This helps stop the wires coming loose from the box). Lower the bundle of bunched LEDs until it is an inch or two above the floor, making sure you have enough room to swing it round without knocking into anything or anyone.
- Place an object on the ground (I use a silver coin) to mark the centre of the orb. This is not essential, but it is useful.
- Focus your camera if you haven’t yet (its always helpful to have a friend on hand to help focus in the dark, but if you’re on your own, place a small torch on the silver coin and focus on that point).
- Standing just behind the coin open your camera shutter using wireless shutter release (if you have a cabled shutter release, you will need to open the shutter then move into position).
- Start to spin your orb tool. Once you have a good spin going, turn on the lights with the switch on the battery box in your other hand.
- Keep spinning and slowly (taking tiny steps) moving your body around the silver coin trying to ensure the LEDs pass over the coin on each turn (this will help keep your orbs neat).
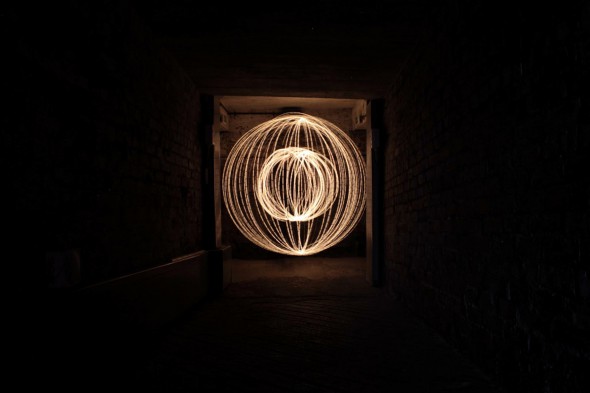
Quick Tip #2: Only move / spin with your wrist, not your whole arm, I keep my wrist tucked in just under my ribs, this help to keep your orbs nice and neat and round!
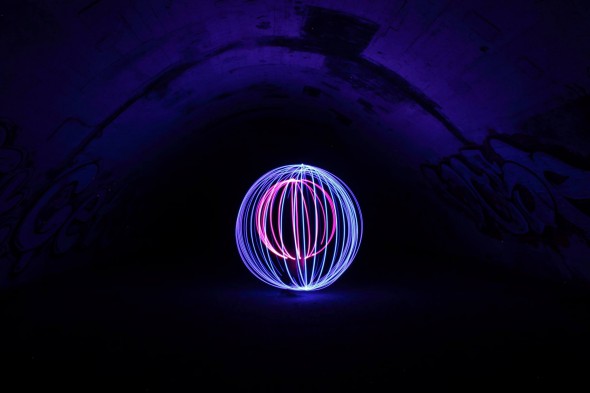
Quick Tip #3: You only need to walk 180° round while spinning, not the full 360°. The lights go 360° all the way round so you don’t have to.
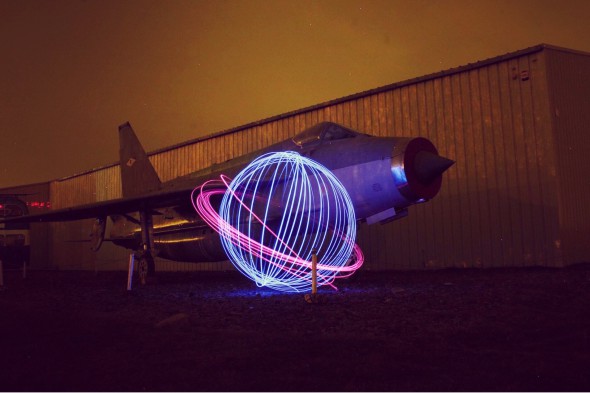
The most important part of light painting is having fun and sharing your creations. There are no rights and no wrongs with light painting, just interesting pictures! Please tweet your light painting experiments to @WexTweets and myself @claireharpz using the #wexphoto #wexlightpainting hashtags, we would love to see your results!
About the Author
Claire Harper is a photographer, tour guide and light painter. Follow her on Twitter @ClaireHarpz

