Poor audio can make any video feel unprofessional. Kristian Hampton runs through the basics of how to improve

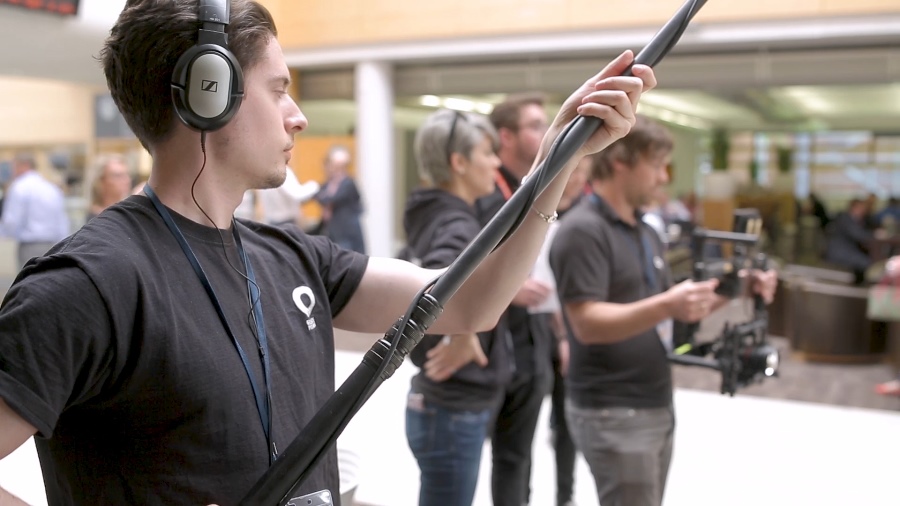
Monitoring
When filming on a DSLR or CSC, we look at the image on the rear screen to give us confidence in the images we are capturing. Therefore when it comes to audio, we should be doing the equivalent.
Most DSLR/CSCs have a standard headphone audio output. Normally, without even touching the settings of your camera, you can plug in a set of headphones and start hearing the audio your camera is capturing in real time.
You can of course use any headphones that use the standard 3.5mm jack connector. However, I’d recommend that you use a set of headphones that have been designed specifically for professional audio.
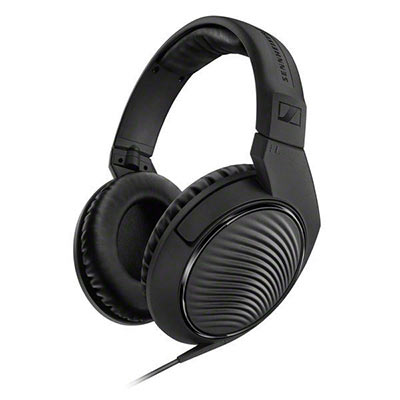
The Sennheiser HD 200 pro headphones are perfect for live sound recording.
Offering detailed, powerful sound, with ambient noise significantly decreased
It’s best practice to listen to your audio as you’re filming. If you don’t, you may miss unwanted background noise intruding on the recording, and by the time you get to the edit and notice it, it’s going to be too late.
This is the first step to better your audio. It’s referred to as “monitoring”. And now that we can hear what we are capturing, we can now work towards improving it.
Levels
To make sure that the sound we want to capture is going to be recorded as a healthy signal in camera, we need to make sure that we can visually see the audio levels on screen (this referring to the volume of the sound the camera is recording).
You may need to go into the settings of your camera to get the audiometers to display, however most cameras in video mode will bring these meters up on screen automatically.
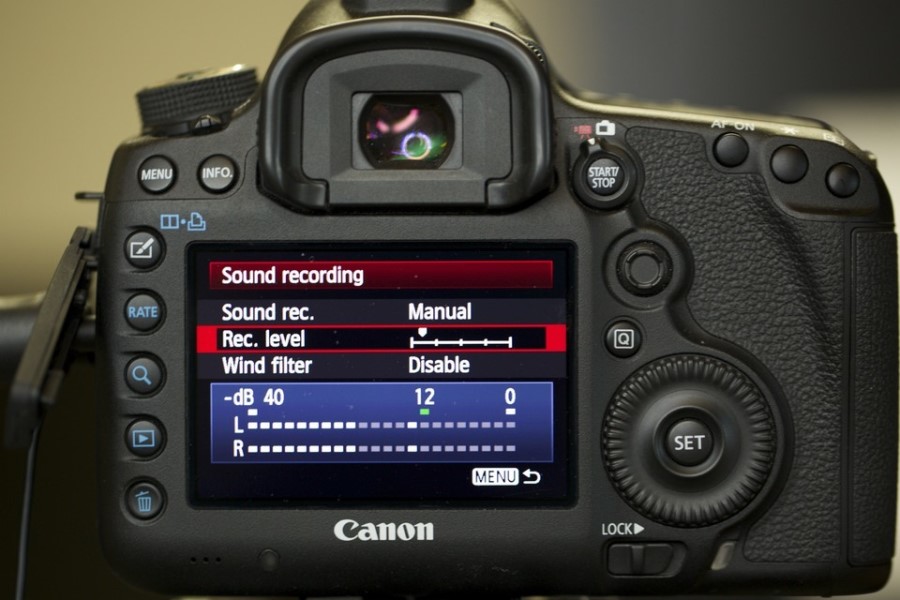
Let’s say that the subject you’re filming is a person talking to camera. To capture what’s deemed a healthy signal, we would want the audio level to be set so that when that person is speaking at their loudest, the meter is hitting the far right of the bar, but crucially not touching the end red section. If it does hit the red, that part of the signal is going to be distorted as it’s outside of the camera’s range to deal with it – this is called “clipping”, and is something to be avoided.
So to get a healthy signal, you need to adjust the microphone’s volume, which is normally found within the camera settings. This means that the audio signal is as far right as possible without it ever clipping.
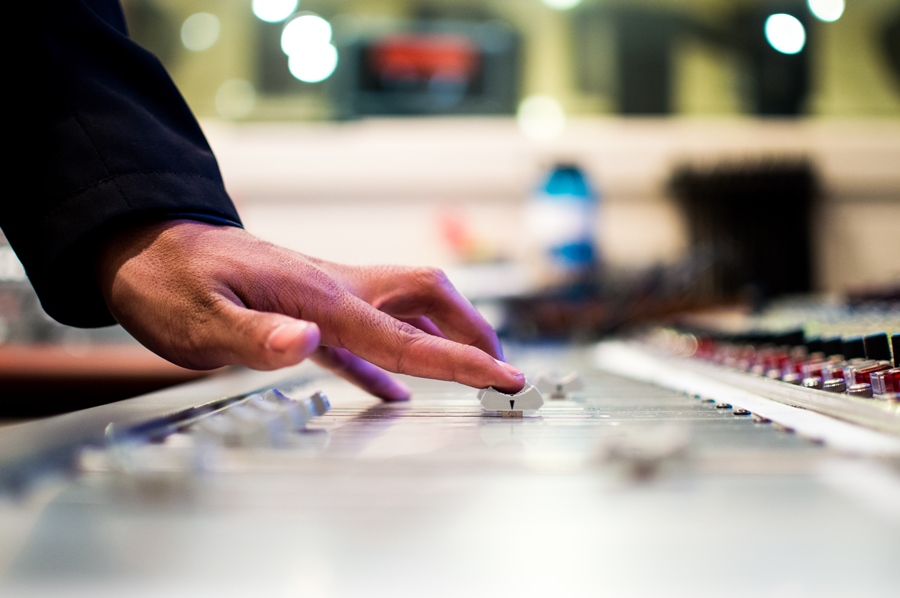
Setting your audio levels in camera operates under the same principles as setting the audio levels in a mix; it’s just done via software instead of physical controls such as faders.
Lots of cameras will be set to operate these levels automatically; this is often called Automatic Gain Control (AGC). It constantly monitors audio and increases or decreases the volume until the microphone signal that is being recorded is at a healthy level.
So why is that a bad thing? Well, if we take our presenter talking to camera example, when the presenter isn’t speaking, the AGC will ramp up the volume, as it doesn’t hear much apart from background noise. When they then start to speak, the AGC will decrease the volume dramatically to accommodate for the now very loud dialogue.
The result is a constant see-sawing of levels, and is difficult to treat in the edit. I’d recommend that you switch this off and run the levels manually as described, giving you full control.
Microphones
For the most part, not relying on the built-in microphone on a DSLR/CSC is going to differentiate what sounds amateur from what sounds professional. If we use the example of filming someone talking to camera again, using the camera’s built-in microphone is going to result in him or her sounding distant, with prominent background noise.
Problems with using built-in camera microphones:
• They are, as the name states, built into the camera. Therefore they will pick up lots of camera noise, lens noise, and even the sound of the operator breathing.
• In order to get isolated and clear audio of someone speaking, the camera needs to get very close to the speaker. It only really works if you’re comfortable with extreme close-up shots of your speakers face.
• They normally don’t have any form of wind protection, so on a windy day I wouldn’t expect to hear anything other than, well, wind.
• They are generally cheap. Consumer DSLR/CSCs were designed with the primary purpose of capturing quality images rather than quality audio.
So before we carry on, let’s quickly address what a microphone does. It converts acoustical energy (sound waves) into electrical current (audio signal). There are different methods of doing this, which is why there are so many different types of microphones on the market. However, one thing they all have in common is that they all rely on a diaphragm to do this conversion. The diaphragm is what the acoustical energy hits – this causes the diaphragm to move, thereby creating an alternating electrical current that represents the acoustic wave now as an audio signal.
Condenser microphones are generally the most sensitive type of microphone used for video. They rely on an electrical current of 48v to amplify the tiny electrical voltage that the diaphragm creates through movement, hence why they are very sensitive. This electrical boost is provided either by another device or by a battery housed within the microphone’s body.
There are two common types of condenser microphones used in filmmaking: the shotgun and the lavalier. The shotgun is a directional microphone – a very versatile tool that can be used for recording the scenes atmosphere, sound effects and dialogue (if pointed towards the speaker, at relatively close proximity). The lavalier is a small microphone that is used for capturing dialogue, usually clipped onto the speakers clothing.
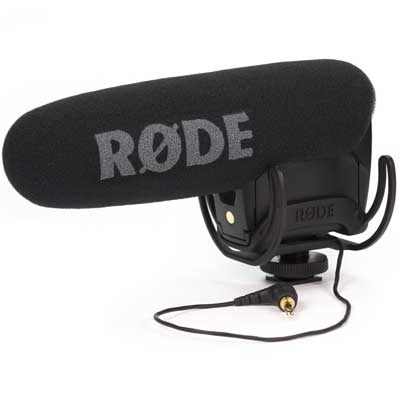
The Rode Video Mic Pro R is a great starting point to improving your on-camera audio capture.
As a starting point, updating your on-board microphone with an external shotgun, such as the Rode Video Mic Pro, is going to give you an instant improvement in quality. It’s mounted on a shock mount, which means that when handling the camera, the vibrations you create touching the body and lens won’t translate through to the microphone. The Video Mic Pro connects directly to your camera via the standard 3.5mm audio jack (just ensure that your camera has an external microphone input), so no additional equipment is needed, except a single 9v battery to power it.
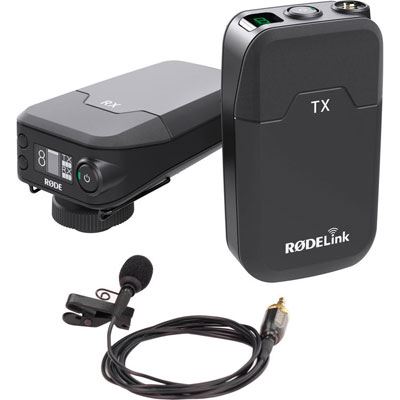
When it comes to recording dialogue, the Rode RodeLink Filmmaker kit offers high-quality audio in a wireless system for £319
If you’re going to be recording lots of dialogue then a lavalier microphone is going to be your best bet for getting crisp and clear speech. Since these microphones attach to the presenter’s clothing, it makes life much easier to invest in a wireless system; that way you don’t need to worry about your camera being constantly attached to whoever is speaking.
The Rode RodeLink filmmaker kit is a straightforward, easy-to-use system – no need to fiddle around with operating frequencies and the like. This system is pretty much plug and play, and it works incredibly well.
Connections
Up to this point we’ve talked about connecting these microphones directly to your camera via the 3.5mm jack input. Although this makes for an easy set up, as there’s no need to buy any additional equipment, it is still rather limiting, since you only have the one microphone input available.
There are two recommended options for getting around this, and that’s to either use an external recorder or to buy a proprietary audio adapter for your specific camera (that is, of course, if your camera manufacturer makes one).
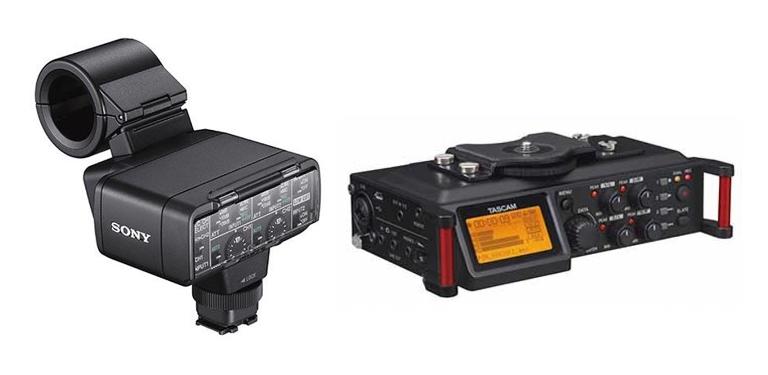
Left: the Sony XLR K2M adds two channels of audio input and mounts directly to the hot shoe of compatible Sony cameras. Right: the Tascam DR-60D external recorder has four channels of audio input and can mount directly under the camera, or be kept completely separate.
Investing in either of these solutions will not only usually bring at least two microphone inputs to the table, but also give you the added benefit of using the industry standard when it comes to audio connections: the balanced XLR. Without going too much into detail, balanced audio is much less prone to RF interference. Allowing you to use much longer cables than when using unbalanced audio, whilst still attaining a quality audio signal with minimal noise.
Both these solutions also give you physical controls of the audio levels, much quicker than having to jump into your camera settings to adjust. They can also supply the 48v of power (called phantom power), which is needed to use condenser microphones. As mentioned, some microphones have this power supplied by an internal battery, but typically the more high-end microphones expect this power to be supplied externally.
With external recorders you have the freedom to be detached from the camera, particularly useful for when you want your camera to be further away from the action whilst still capturing close-up audio, or if you’re working on a slightly bigger project, you can have someone else manage the audio side of things, while you concentrate on the video.
What’s next?
We’ve covered the basics to get your improve your audio recording capabilities, but what about your knowledge in getting the most out of it? There are a few things that we still need to cover, which we will do in our next post.
Here’s what’s to come:
• Polar patterns (directional and omnidirectional microphones)
• Microphone placement techniques
• Recording formats (sample rate and bit-depth)
• Audio post production basics
If you have any questions about audio you’d like to see answered in the blog, feel free to ask us on Twitter.
Click here for Part 2
About the Author
Kristian Hampton is Wex Photo Video’s Technical Editor for Pro Video. A video specialist who has worked in corporate studios for companies such as Vodafone Group and PwC, as well as working as a freelance grip on various TV productions and features. He also runs Krade Media, providing enterprises with production services. Follow Kristian on twitter @KrissHampton
Related articles
Sennheiser AVX-ME2 Wireless Lavalier System Review
5 Reasons Why External Recorders Will Improve Your Filmmaking
How to “Just Get Out There and Film”

