Everyone’s probably come home from holiday with photos that aren’t as good as they could have been. Let Matt Golowczynski be your guide as he runs through the seven most common travel photography mistakes, and how to correct them.
One of the greatest joys of travelling or going on holiday is the opportunity to photograph something different – after all, there’s a good chance you will have been inspired to go to a particular location after seeing what someone else has captured. While professional travel photographers may be used to getting up early for the benefit of fine shooting conditions, and perhaps even have access to places restricted to the rest of us, there are a number of things you can do to deal with crowds, bad light and other issues frequently encountered when photographing your travels. Here are seven common issues and how to get around them.
1. Shooting at the ‘wrong’ time of day
Unless the sole reason for your visit is photographical – i.e. unless you’re prepared to get up and shoot at awkward times – you may be capturing certain landmarks simply whenever is practical to visit them, often between the morning and late afternoon. This is the point at which the sun is directly overhead, where light is harsh and strong shadows work to create too much contrast to flatter most subjects. You may also encounter flare from the sun, which can encroach onto details in the scene, and lose highlight details from the dynamic range of the scene being too strong. In short, there are a number of reasons why your images may not turn out as you expect.
Despite these challenges, there are a number of things you can try to help you capture great images. A lens hood will help you to block out extraneous light, which will minimise the risk of flare and help to improve contrast and saturation. A polariser, which is generally ineffective against most scenes when the sun is low down in the sky, can help you to deepen blue skies which may otherwise appear washed out in midday light. Keeping an eye on your histogram will also show how much detail is being lost in shadows and highlights and it’s worth remembering that strong light is also ideal for capturing black-and-white images with plenty of contrast, such as when shooting architecture and silhouettes. Try switching to your camera’s monochrome mode to see what you can end up with.
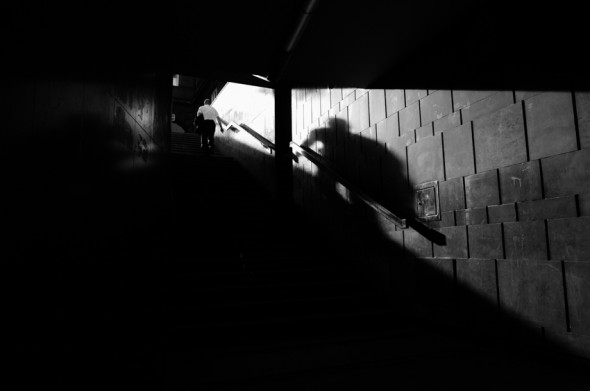
Strong light is great for capturing silhouettes and other images where you want high contrast.
2. Unwanted reflections
If you’re into expansive views of cities you may venture up a skyscraper that has an observation deck of some kind. Some of these, such as New York’s Rockefeller Center, may have gaps between viewing windows that will allow you to shoot unobstructed, but more often that not, you will be forced to photograph through windows. Depending on the time of day you visit, and what’s behind you, you may have the annoying problem of reflections in the windows ruining your shot. So how do you deal with this?
You may be able to successfully process these out in post-production, but it’s far easier to simply use a polariser as you shoot. This will usually remove – or at the very least lessen – reflections such as other windows and people walking past you. Simply turn the filter until you can see the reflections at their least visible, and make sure not to get your fingers in the frame as you do so.
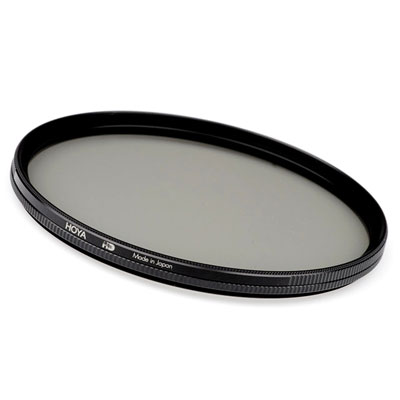
A polariser
3. Always seeing the big picture
It’s easy to miss out smaller details that characterise a building when trying to capture it as a whole, but doing so robs your images of diversity. While a wide shot can place subjects into context and help set the scene, decontextualising it by focusing on smaller details can add mystery and interest. The sense of scale and the relationship to other elements in the scene may be lost, and this in turn may intrigue the viewer further.
Focusing on particularly smaller areas also has another advantage; if you’re shooting at a time of day where shadows mar part of the scene, or indoors where different light sources cause uneven white balance across the frame, focusing on a smaller, unaffected area can get around this and help create a less obvious image.

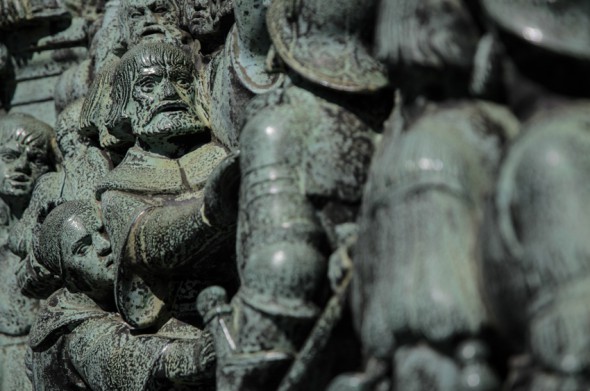
These miniature statues form part of a much larger structure but isolating them severs this relationship and places focus entirely on their details.
4. Converging verticals
If you’re photographing buildings from street level, you’re likely to hold your camera at an angle so that you can capture the subject in its entirety. This is likely to introduce an effect known as converging verticals, where buildings appear to be toppling over. Photographers will normally correct for this by adjusting the perspective via in-camera editing options, or later on in software, but you may not have enough redundant space around your subject to do this successfully. Furthermore, as this effectively stretches the subject, the quality of your image may be affected.
For minor adjustments your image should be able to withstand this, but there is another method which can result a more natural look without any stretching. Simply step back or zoom out far enough so that you can capture the subject without angling the camera upwards and then crop away any redundant details, something you may be able to do instantly in camera. While this technique will result in a lower output resolution (i.e. from the parts you discard), straight away you can have an image with a more natural perspective and no stretching or warping of details.
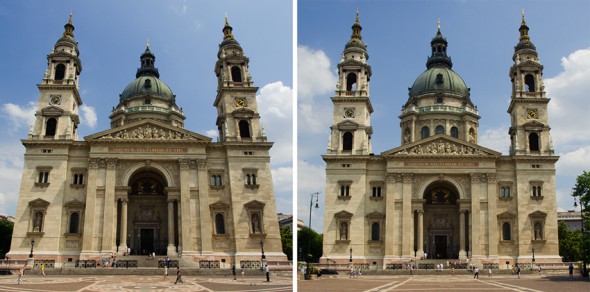
The image on the left was captured by angling the camera upwards; applying sufficient perspective control to this would crop out the spires. The image on the right was captured further away and quickly cropped in camera.
5. Unwanted people and crowds in your photos
Star attractions often mean big crowds, and this can make it difficult to take an image without a handful of unwanted people marring the view. Annoying as this is, it’s not insurmountable. You could, for example, try placing your camera on a tripod and capturing the scene with a long exposure, which will blur movement from passers by against a static subject. This may be more difficult during the day where there is too much light to allow for a long exposure, but a low ISO setting and a neutral density ND filter will help you to lengthen this to an appropriate shutter speed.
The presence of others can also be seen as a blessing inasmuch as it forces you to think about an image differently and capture it in a less conventional manner. You may, for example, find an alternative viewpoint that results in a completely different type of image, or you could intentionally include people in the frame to make them part of the image, perhaps to provide a sense of scale or to illustrate their relationship to the subject. This latter technique can work particularly well when rendering a person in silhouette.
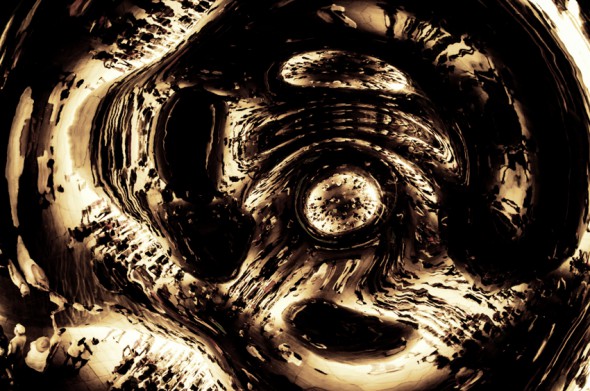
Chicago’s Cloud Gate by Anish Kapoor, affectionately known as ‘The Bean’, is constantly swarmed with camera-toting tourists. Photographing the underside of it and actively making people part of the composition has resulted in a different, more abstract result to the obvious.
6. Sticking to the standard aspect ratio
We’re so used to the standard aspect ratio of our camera’s sensors that we forget there are often a number of alternatives, some of which may be far better suited to the scene in front of us. Sure, you can crop images afterwards but getting it right as you shoot will mean you can compose specifically for that ratio.
An elongated aspect ratio such as 16:9 is obviously a good choice for a landscape or a skyline, where you may otherwise have too much redundant sky or ground in the frame, while a 1:1 (square) format can suit portraits and patterns. It’s worth remembering that some of history’s most iconic images were captured on medium format film cameras, which typically produced images in 6×6, 6×7 or 6×4.5 aspect ratios (the latter, incidentally, offering same aspect ratio as the sensors inside Micro Four Thirds cameras).
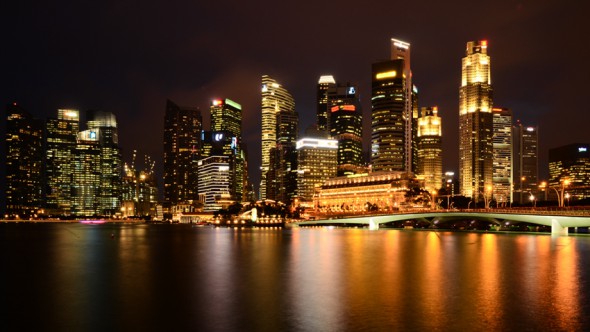
A 16:9 aspect ratio can be used to capture the skyline of a city without any redundant sky or ground.
7. Overlooking some form of support
There’s a good chance you won’t take all your usual gear with you when on holiday. You probably won’t, for example, want to walk around with a tripod all day, particularly if daytime conditions allow you to shoot handheld. Nevertheless, there are a number of smaller and lighter alternatives to a standard-sized tripod, such as rucksack-friendly tripods, monopods, table-top tripods, Gorillapods and beanbags, and these are well worth considering when you think about the variety of situations in which they can assist with an image.
The obvious advantage is when capturing images with particularly small apertures and long exposures at night, although, going back to tip #5, you may also choose to capture a long exposure during the day if the scene suits it. Such supports can also be used to angle a camera on the ground or a low wall for the purpose of a group or self portrait, or to move a camera evenly around a scene when either panning a subject or a scene during video recording. A stable camera positioned appropriately on one of the above can obviously also be used to record timelapse footage, so pack one if you can to help expand your creative possibilities.
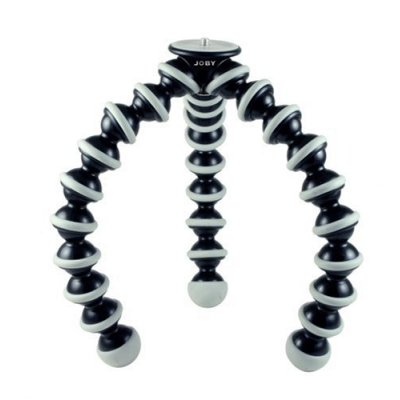
A Joby Gorillapod

