You don’t need expensive studio lights, says Richard Sibley of AP, as he explains how to take simple portraits using regular household lamps.
Getting Started
While professional photographers often use thousands of pounds worth of studio lighting equipment when taking portraits, this isn’t usually the case for the amateur photographer. Even though there are some excellent studio lighting kits aimed at the amateur market, these aren’t always necessary to take a great portrait. In fact, you can use a regular household lamp.
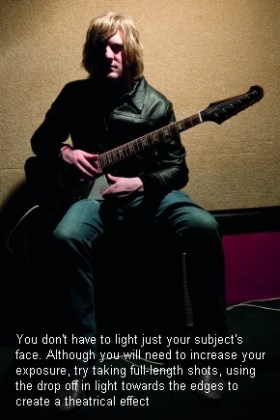
You may not have softboxes, umbrellas, snoots and grids available for your household lamps, but you do have a readily available source of light, and if you use a desk lamp, that light source can be directional.
Most people should already own a suitable lamp, and even if they don’t a cheap one should cost under £5. You obviously can’t expect to be able to replicate the results that can be achieved with studio flash kits, but with some knowledge and creativity you can use a humble desk lamp to very good effect.

Equipment
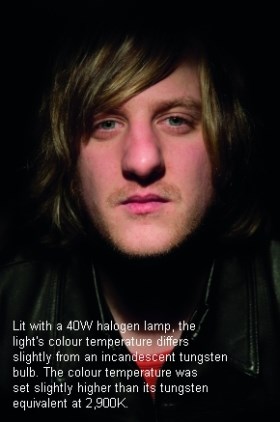
You can shoot portraits lit with household lamps using either film or a digital camera. If using film, it is far simpler to use black & white film than colour. As most colour film is balanced for daylight, not tungsten, it must be colour corrected using a blue filter. For household tungsten bulbs of 100W or less, it is best to use an 80A blue filter. This should neutralise the orange/yellow cast caused by the bulb. Any further slight adjustments can be made at the printing stage. However, the filter will also require you to alter your exposure by +2EV, which will lead to a shallower depth of field or a increased exposure time. Digital imaging therefore has an advantage as you can adjust the colour temperature in-camera, or in software from a raw file.
Given that you will be shooting in low light, a Digital SLR that shows little noise at ISO 400 and above is recommended, as is a lens with an aperture of f/2.8 or wider. I recommend a standard 50mm f/1.8 lens for this type of shot, and you can use the shallow depth of field to your advantage.
As for the lights themselves, any directional source of light is suitable. I found that small desk lamps work best, but even the secondary articulated lamps that are often found on uplighters are suitable.
Also required is something suitable on which to rest the lamp. Given the close proximity needed between the light and the subject, a nearby table or chair should be suitable.
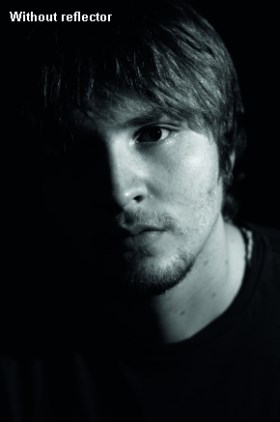
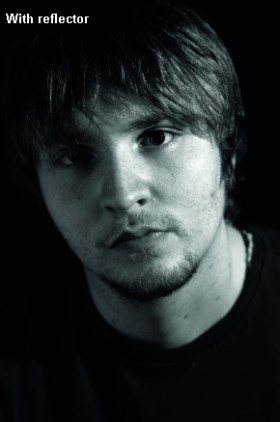
As the light won’t be diffused, it may create harsh shadows. To help soften shadows and add light to the subject, try using a reflector. A simple piece of A3 card or paper is perfectly suitable for this task.


These two images, lit by a single lamp, were taken at exactly the same exposure of 1/15sec at f/2.8 and ISO 400. However, by using a sheet of white card I have been able to reflect some of the light from the lamp on to the left of the subject’s face, helping to reveal some of the otherwise hidden detail.
Top Tips
- If your camera is noisy at ISO 400, use this to your advantage. Using Adobe Photoshop or similar software, convert the image to black & white and then add a noise or grain effect to the image. Adjust the amount of noise so that the image has the appearance of grainy black & white film
- Remember to leave your light for a few minutes to reach its maximum colour temperature before taking a white balance reading
- A tripod will help keep your camera and lens steady, but your subject will also have to remain as still as possible to avoid blurring the picture
- You don’t have to adjust the white balance to make the colour temperature neutral; try using different bulbs to produce different cool and
warm colour temperatures - A sheet of white card makes an excellent reflector to help fill in shadows on your subject’s face


A note on Light Bulbs
By 2012, all standard household incandescent light bulbs will be phased out, with numerous alternatives now coming onto the market. In fact, 150W and 100W tungsten incandescent bulbs are already being phased out. The 60W and 40W bulbs commonly used in most household desk lamps will remain available for longer, though, as they consume
less power.
Halogen, fluorescent and LED lamps will be the replacement technologies used, but many people have complained about the ‘unnatural’ colour of light these bulbs produce. However, energy-saving light bulbs with a colour temperature comparable to their incandescent equivalents are now common.
The colour temperature of light bulbs changes over time, and this is particularly true with energy-saving fluorescent bulbs. They can take up to five minutes to reach their optimum colour temperature, so if you use these bulbs leave them on for a few minutes before shooting.
As well as having an orange to white shift in colour temperature, energy-saving bulbs may also show a magenta/green shift in colour. This can vary from maker to maker and also with the age of the bulb. Most digital cameras can correct for this, but if in doubt shoot in raw and correct the images in post-production software.
For best results, use your camera to take a white balance reading from a grey card and adjust the white balance manually using the metered reading as a guide.
Guide to Colour Temperatures for tungsten incandescent bulbs
| 40W | 2,500-2,630K |
| 60W | 2,600-2,700K |
| 100W | 2,780-3,000K |
Note: These temperatures will vary depending on the age of the bulb and the time it has been on for.
For more portrait tips visit Amateur Photographer.

