Many photographers looking to make their first few steps into the world of studio photography are often put off very early on by the complexity of studio lighting and the vast range of kits on offer. Even if you have been recommended a brand by a friend as a place to start looking, there are twin head kits, 3 head kits, softbox kits, umbrella kits and a seemingly endless list of potential accessories to accompany these.

As such, it's often the case that the first lighting kit purchased is a basic, two head kit which may contain 2 softboxes, or 2 umbrellas, or possibly one of each. These starter kits tend to be more affordable than their multi-headed counterparts and give the studio beginner less to worry about. However, some newbie photographers also struggle with getting the best from these kits; eventually giving up when they are unable to recreate the shots they've seen in magazines or on websites, and abandoning their virtually unused lighting kits to the cupboard under the stairs.
To extend a helping hand to all frustrated studio beginners, and to challenge myself to see exactly what can be achieved with just the most basic of studio flash equipment, I set up an entry-level 2 head lighting kit in the WEX studio, grabbed a white pop-up reflector, kidnapped a couple of WEX employees as models and started experimenting.
Flat lighting
Probably the easiest place to start with a twin-head lighting kit; the 2 lights are simply placed one either side of the subject. The background isn't important so needs to remain plain and non-intrusive - no light is being directed at the background so a relatively plain, dark background can be turned completely black. If you don't want the lighting to be completely symmetrical, the power on the lights can be varied slightly. However, when working in a small studio environment it's often necessary to turn the lights down as low as they can go to avoid over exposure. This was the case in this shoot, so there was no opportunity to vary the output.
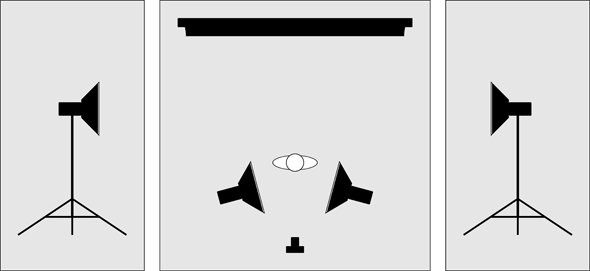
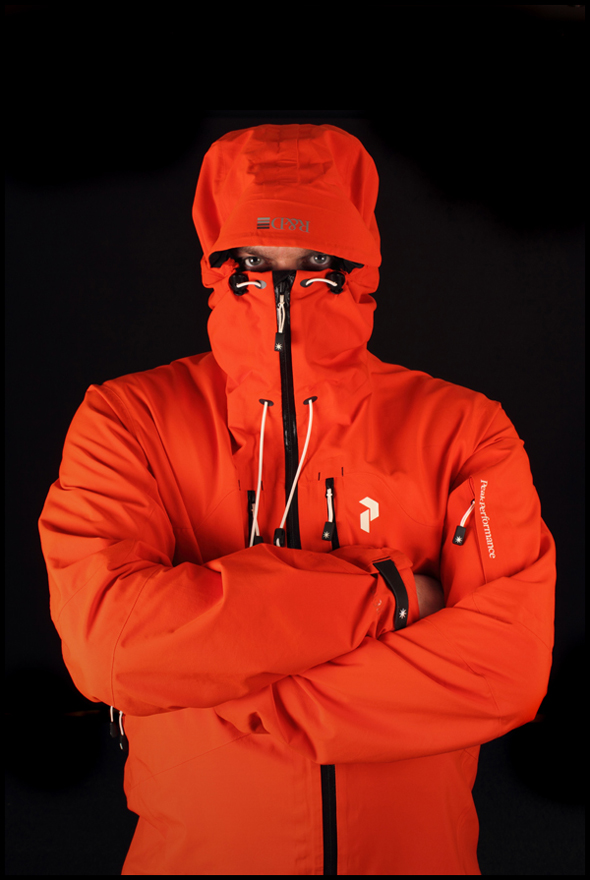
This image was shot using this flat lighting set up with both heads at their lowest power and a black paper roll as the backdrop. The ISO was set at 100 and the shutter speed at 1/60 second to ensure the correct flash sync. This required an aperture of f/11 - quite high for a portrait shot, but workable with the subject placed some distance from the background.
High-key lighting
High-key lighting is one of those styles that everybody is familiar with and, judging by the questions we get asked at Wex Photographic, many want to emulate.
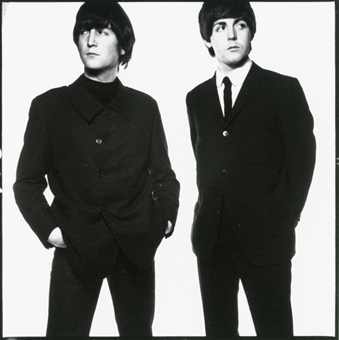
Although the technique has been brought to the fore again recently by a high-street portrait studio, it was a very popular style in the 1950s and '60s, with David Bailey being a notable practitioner of the high-key portrait.
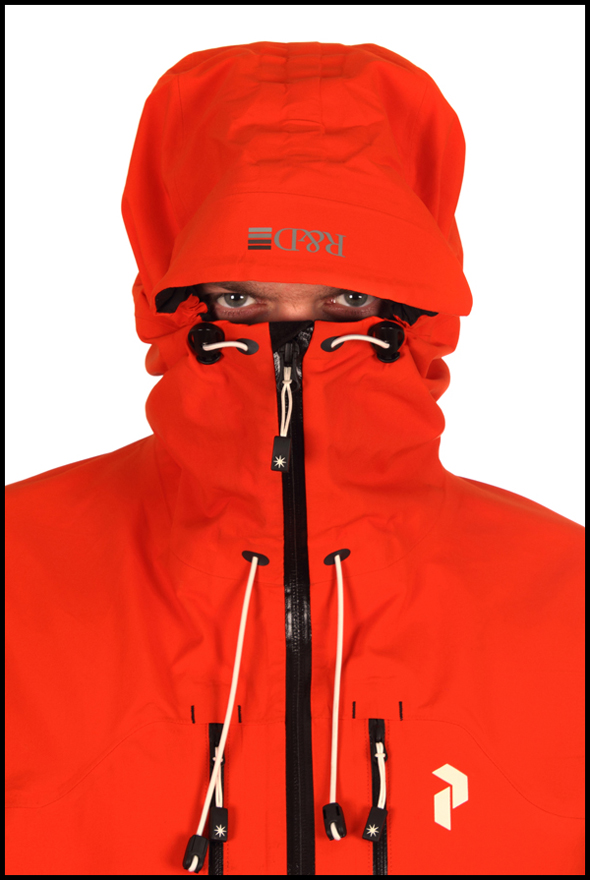
The goal is quite simple: to light the background so that it is bright and free from distractions, and to also illuminate the subject in a bold and bright manner with little variation in lighting across the scene and minimal shadows. This might seem like quite a challenge with just 2 lighting heads, but as mentioned previously, getting enough brightness from the heads when used in close proximity to the subject and background is not a problem. However, the plain white reflector was used to keep the subject illumination even by bouncing some light back in from the side.

This image was shot using a high-key lighting set up. The head illuminating the background was positioned low, pointing up at the white paper backdrop, with the power turned up a stop above minimum. The light used to illuminate the subject was set on minimum power and placed to the right of them, with the reflector placed on the left to bounce light back in. The ISO remained at 100 and the shutter speed and aperture also remained the same as for the previous shot at 1/60 second and f/11 respectively. As a result it was once again necessary to maintain some distance between the background and the subject.
Low-key lighting
Low-key lighting is perhaps one of my favourite styles. The actual set up can be deceptively simple, but the end result can be full of drama and emotion. However, it's not necessarily the easiest technique to master; when you're dealing with a simple set-up even the most subtle of adjustments can make or break an image, so it's important to pay close attention to where the light falls and how shadows appear, making tiny adjustments here and there until you get the shot you want.
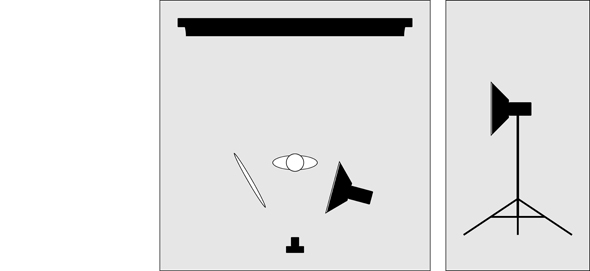
This low-key image was shot using a single lighting head on minimum power, plus the white reflector to gently bounce back some light into the shadow areas. The black paper roll was once again used as a backdrop, and the light and reflector were adjusted just an inch at a time until they were in the right position and angled correctly. At ISO 100 and with a shutter speed of 1/60 second an aperture of f/14 was required to keep the slightly under-exposed look that low-key shots have. The distance between subject and background and the fact that the backdrop was plain black and unlit ensured that it remained unobtrusive, even with such a high aperture.
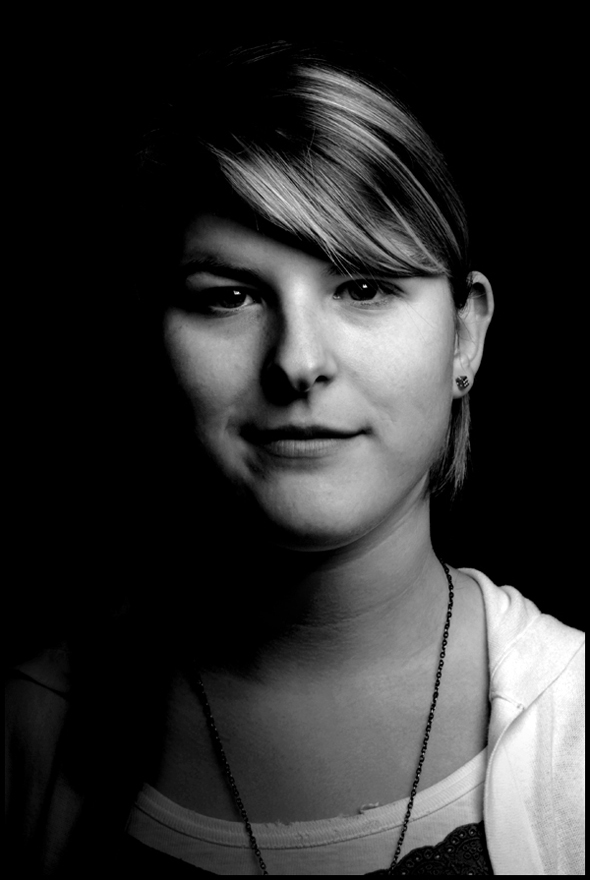
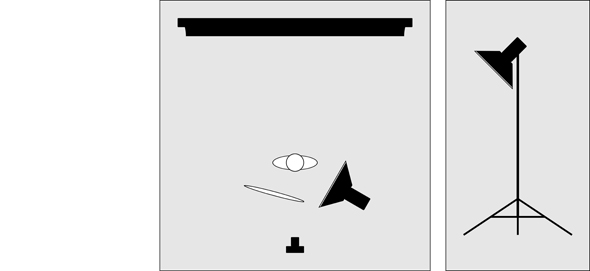
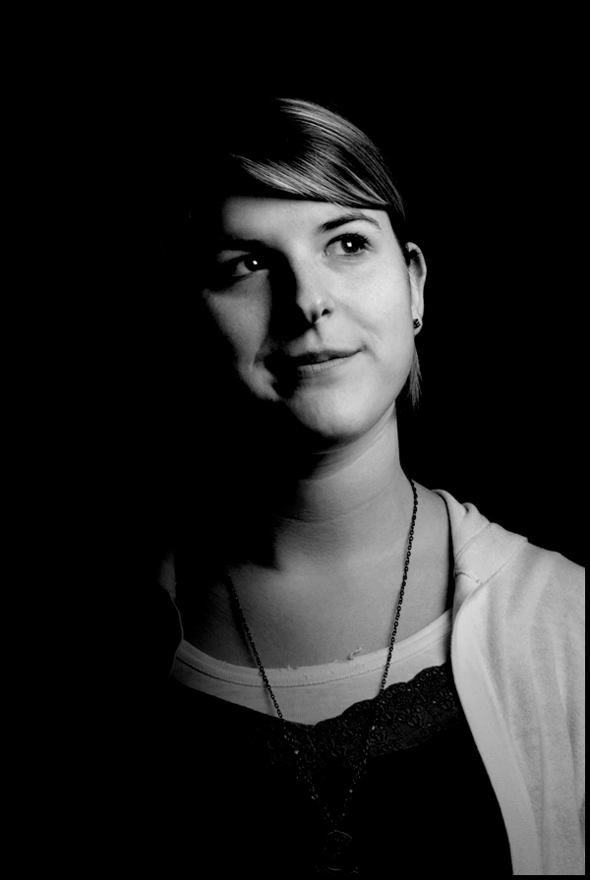
When working with just one light and a reflector, the angle and positioning of the light is all important. As such it's worth moving both around to see what subtle changes occur. For this second low-key shot the set-up was much the same, but the light was elevated and pointed down onto the subject, with the reflector angled to fill in some of the shadow areas.
The same exposure settings were used as for the previous low-key shot: ISO 100, a shutter speed of 1/60 second and an aperture of f/14. Only the position of the lighting-head and the fall and spread of the light was altered.
Backlit still life shots
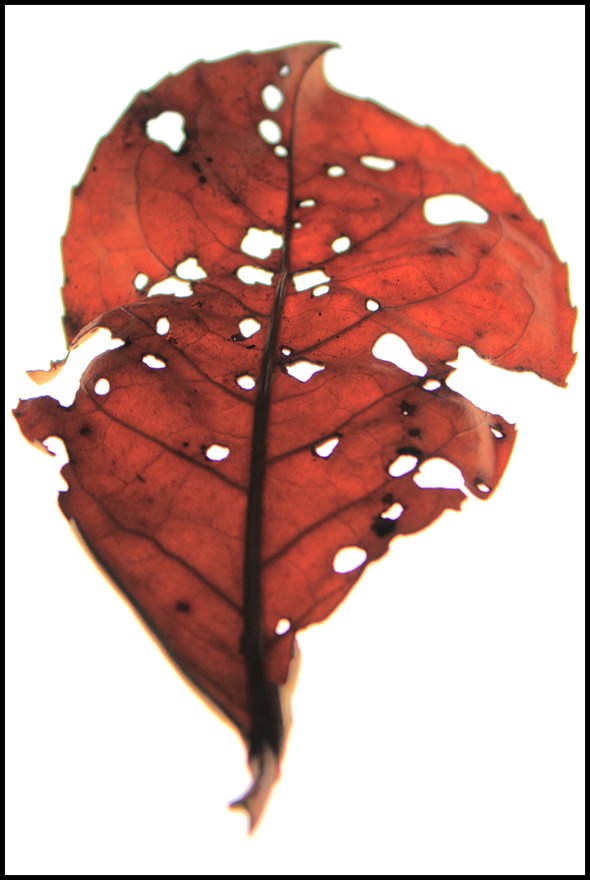
There came a point where I had to let the WEX employees go - they had work to be doing after all. As such, I set about seeing what other shots I could conjure up using just the 2 lighting heads and some Autumnal objects gathered from the Wex Photographic car-park. I've always liked the look of back-lit still-life and product shots and wanted to see if I could achieve a similar look by using the softbox on one of the heads as both the light-source and the backdrop by placing the objects to be photographed directly onto it.
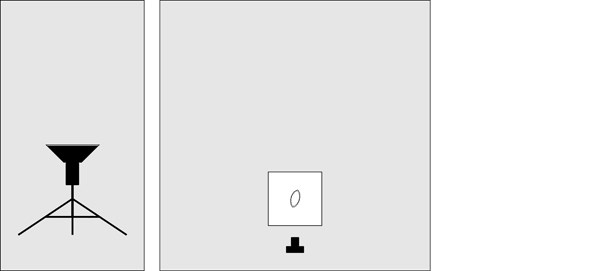
The exposure had to be such that the softbox would be suitably bright, but that the leaf placed on it could also be correctly exposed. This required a shutter speed of 1/80 second and an aperture of f/5.6 at ISO 100.
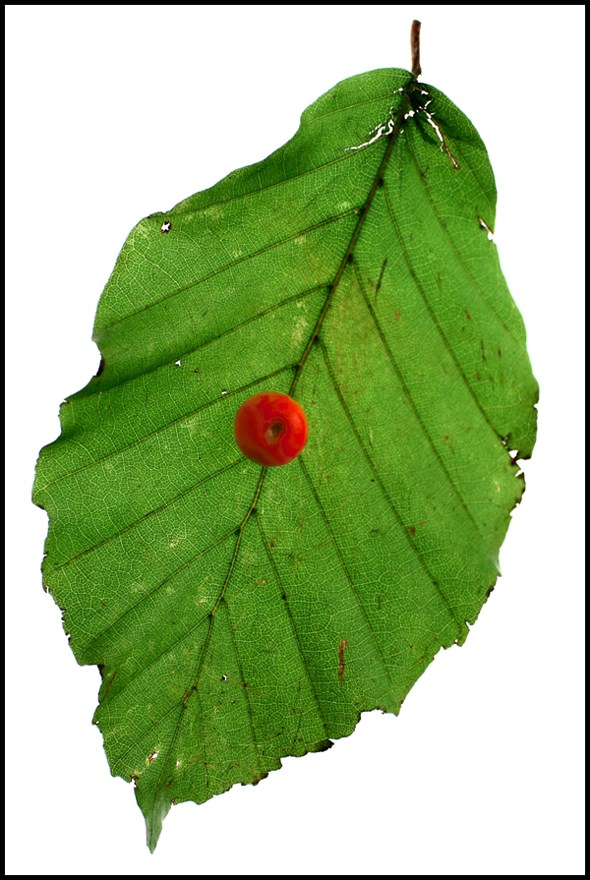
The introduction of the second head meant that it was much easier to fully illuminate the entire object, rather than just projecting light from underneath it. As such I was able to experiment by using multiple subjects.
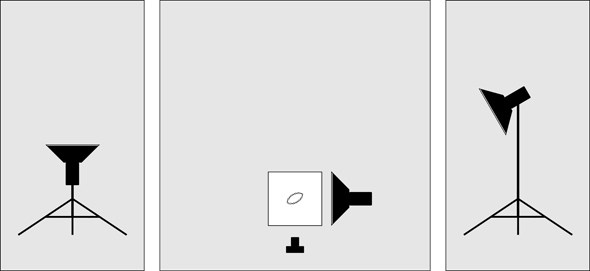
The exposure was very similar to the first shot, requiring a shutter speed of 1/80 and an aperture of f/5 at ISO 100. As with all the studio photographs, this was shot in RAW to give me the best possible chance of getting the correct exposure and colour balance in the final image.
Limitations
To give you a better picture of the set up I was using it's worth providing some information on the studio space itself. It's a smallish area measuring approximately 3.6m wide x 5.5m long (12 feet x 18 feet). In addition, the WEX studio also has quite a low ceiling at only 2.3m high (7' 6"). In such a relatively small space the main issue is getting the power of the lights low enough. With the walls and ceiling all light in colour, light is bounced about and makes controlling exposure difficult.
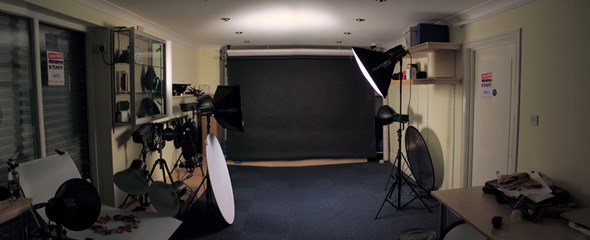
However, this is in no way the fault of the lights and what's more, is likely to be the same situation for anybody using their lighting kit in living rooms across the country. Despite these challenges I was able to achieve all the styles and techniques I set out to, although this often meant using a higher aperture than I might otherwise have liked and placing my subjects some distance from the background to compensate.
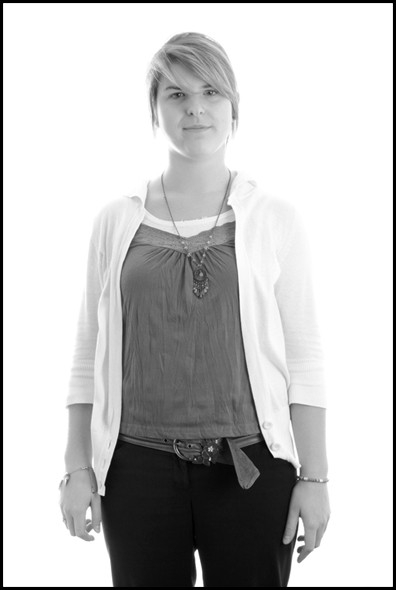
These twin head kits are adequate for most purposes and, although best suited to individual head and shoulder portraits, it is possible to use these for longer length shots or pictures of 2-3 people. However, for larger groups you really do need to consider a third light to ensure even lighting.
Suggested kits
For those looking to get their own lighting equipment and try some studio photography, this first purchase is an important one. Although you may not want to spend an absolute fortune on gear if you are only just starting out, at the same time it's important that the kit you do get allows you to expand it with the addition of accessories and, quite possibly, additional lights in the future. The two kits shown below are ideal in many respects; they won't blow your budget, are well made, and are backed up by their manufacturers' huge range of accessories. Plenty of other lighting kits are available, so you may want to do some additional research, but these are an excellent place to start.
Elinchrom D-Lite it 4 Studio 2 Go Set
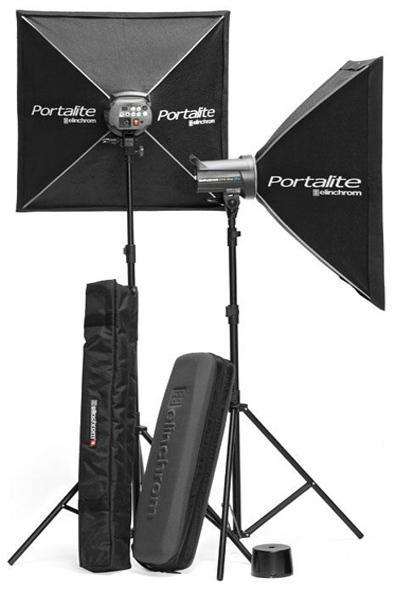
The gear I used in the WEX studio to shoot these images was the original Elinchrom D-Lite 4 kit. This latest incarnation of that kit has been upgraded with a more robust handle, a stronger stand bracket and an inbuilt Skyport wireless control.
It includes two Elinchrom D-Lite it 4 heads, two Portalite 66x66cm softboxes, one 16cm metal reflector, one Skyport Eco Transmitter, plus stands, cables, leads and a kit bags. The D-Lite it 4 heads can be fitted with a range of optional accessories from Elinchrom's range, including various lighting control devices such as reflectors, snoots and barn-doors, softboxes and umbrellas.
The inclusion of the Elinchrom Skyport Eco trigger means that, in conjunction with the D-Lite it 4 heads' wireless capabilities, you can work sync-lead free. This is a benefit in any shooting environment, be that a dedicated studio or somebody's living room, where the fewer cables there are to trip over the better!
Bowens Gemini 400/400 Twin Head Studio Kit (with Radio Trigger)
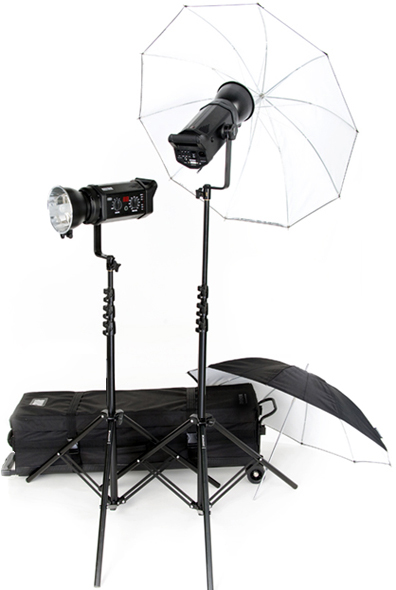
Bowens are a well respected British manufacturer of studio lighting gear. Their equipment is built extremely well and is full of clever technology, making it both reliable and convenient to use.
This kit includes two Bowens Gemini 400 heads, two 90cm silver/white umbrellas, two umbrella reflectors (to hold the brollies on the lights and direct the illumination), plus stands, cables, leads and a kit bag. The Gemini lights can be fitted with a huge range of optional accessories from Bowen's range, including various lighting control devices such as reflectors, snoots and barn-doors, softboxes and umbrellas, and can be used with the Bowens Travel Pak battery packs for complete portability.
Studio lighting guru Steve Aves reviewed the Gemini heads when they were first launched and was suitably impressed by them. Read his full review here.
Other gear
 Along with the lighting kit in the WEX studio I also made regular use of a white pop-up reflector. This is a relative inexpensive but extremely useful piece of equipment which I recommend purchasing in addition to the lights. They are available in a range of sizes and shapes - I used a WexPro 110cm 5-in1 Reflector which comes with several coloured covers for different effects, as well as the standard white base which I used. The Lastolite TriGrip reflectors are an alternative product that offer greater ease of use for photographers operating on their own, albeit at a slightly more expensive price. However, all you really need is something that can be used to reflect light back into the shadow areas of your subjects, so a largish piece of white card may do the job just as well.

