
A guide to digital SLR accessories
If you've bought (or been bought) or are buying a digital SLR camera you may have already discovered that the camera itself is just one of the many things you need to make the most of it. Even if you’re a photographer of the point-and-click variety who only intends to take the odd picture on special occasions, there is no shortage of accessories you should consider in addition to the main product. While many are just nice to have in order to develop your photography, others are absolute essentials without which the camera is almost redundant. In this guide we will look at both kinds; those accessories that you should not consider buying a camera without and those which you may want to put on a “wish-list” for another day.
Essentials
Lenses
It’s an obvious statement to make, but your SLR camera is going to need a lens. If you've bought the “Body Only” version, then no lens is supplied and unless you've already got a lens sitting at home that will fit your new camera, it will be unusable until you've bought some glass to stick on the front of it. Even if you do already have some lenses, it’s worth checking that these will fit and work on the newer cameras. Not all lenses will, and even if they do you may want to consider one of the more up-to-date lenses in order to get the best performance from your new SLR camera.
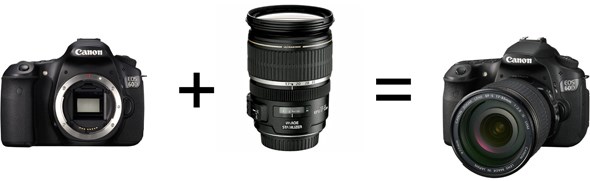
Most digital SLRs are available in kits that will include a lens (twin lens bundles are also often available) and if this is your first SLR camera then one of these kits is a sensible option. However, these tend to be standard general purpose lenses that are OK for everyday shots, but may not be suitable for more subject specific photography. As such, sports, wildlife, close-up and landscape photographers may want to consider purchasing an additional telephoto, macro or wide-angle lens to compliment and be used in conjunction with the standard kit lens.
The pictures a digital SLR camera produces will only ever be as good as the lens attached to it, so it’s worth spending a little time thinking about and researching the lenses that will offer you the best performance for your budget and needs.
For more information on lenses, have a read of our Lens Buying Guide.
Memory cards
Although once upon a time compact digital cameras used to be supplied with a memory card, the same is not true of SLR cameras, and this has caught many a new purchaser out in the past. Imagine getting your shiny new digital SLR camera (and lens, of course) home and out of the box, only to find that you’re unable to take any pictures because you’ve not got a suitable memory card – a truly disappointing experience.
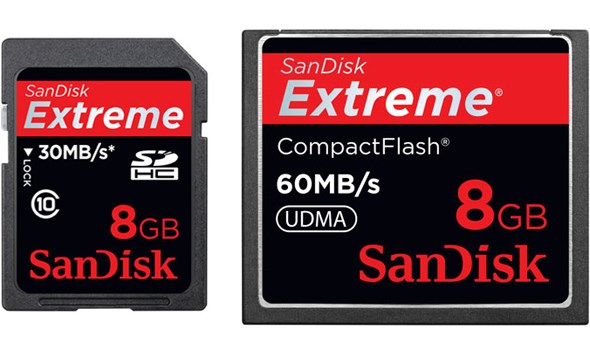
The exact memory card you need will depend on the type of camera and what you intend to do with it. Different models use different types of memory cards so you’ll need to check exactly which one you need, but most cameras will require either a Secure Digital (SD, or SDHC for cards with a capacity greater than 2GB) or a Compact Flash (CF) memory card. These two types of cards are physically very different and one can not be used in place of the other.
You may have memory cards at home from a previous camera and, if you’re lucky, they may even be of the same type as your new purchase. However, things move quickly in the world of digital technology and over the years the resolution of cameras has increased dramatically. The result of this is that the file sizes your new camera produces may be significantly higher than your old model, particularly if your previous camera was a compact. Bigger files take up more space on a memory card, meaning you get fewer pictures. As such it may be worth considering purchasing a newer, larger capacity memory card to ensure you don’t run out of space.
This table is a rough guide to how many pictures you can expect to get on a memory card depending on the resolution of your camera.
| Camera | File size* | 2GB | 4GB | 8GB | 16 GB |
|---|---|---|---|---|---|
| 5 MP | 1.5 MB | 1200 | 2500 | 5100 | 10300 |
| 6 MP | 1.7 MB | 1100 | 2200 | 4400 | 8900 |
| 8 MP | 2.3 MB | 800 | 1650 | 3200 | 6650 |
| 10 MP | 2.9 MB | 650 | 1300 | 2600 | 5200 |
| 12 MP | 3.4 MB | 500 | 1000 | 2100 | 4300 |
| 16 MP | 4.7 MB | 350 | 700 | 1400 | 2900 |
| VIDEO | 5 Mbps (EP) | 45 | 90 | 180 | 360 |
*average file size for a high resolution JPEG
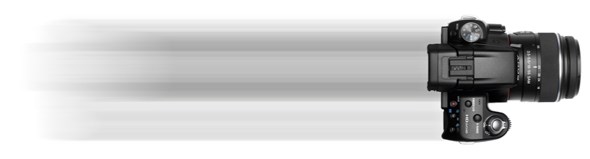
The other factor to consider is the “speed” of the card. When you take a photo, the image is instantly saved in your camera in its “buffer”. As soon as it is saved it starts to be transferred from this buffer to the memory card. The camera’s buffer can only hold so much information (this varies from camera to camera) and when it is full you will not be able to take any more images until the buffer has transferred the data to the memory card. The “speed” of the card determines how quickly this data is moved.
The “Buffer Bucket”
Picture your camera’s buffer as a bucket and the images being saved to it as water. Once the bucket is full, you have to wait for it to empty before you can add more water. Now imagine the bucket has a hole in the bottom that will slowly allow the water to drain out. With one small hole, it may take some time for the bucket to empty, so you have to wait before you can add more water. This is like having a slow memory card that only allows the data to be moved from the buffer at a slow rate. A faster memory card is like putting more holes in the bucket – the water empties faster so you can add more water sooner.

A slower memory card means the buffer fills up faster and takes longer to empty

A faster memory card means the buffer takes longer to fill up and empties more quickly
As mentioned above, new digital SLR file sizes are generally larger than older models and certainly bigger than from a compact camera. As such it’s beneficial to have a memory card that can absorb the information quickly. If you want to shoot wildlife or sports and have an SLR camera that can shoot at a high frame rate, then this is even more important. The Canon EOS 1D X can shoot 12 frames per second and at this speed it’s not long before the buffer is full, so a “faster” memory card will allow the pictures to be transferred more quickly, meaning you can shoot more images in quick succession before you run out of buffer space.
The speed of a memory card is either given as a Class Rating (mainly for SD cards) or as an ‘x’ speed rating (mainly for CF cards). With the Class Rating, the higher the class the faster the card and this rating is especially important for video use where a card with a class higher than 4 is recommended, or higher than 6 for HD video.
| Class rating | Minimum performance |
|---|---|
| Class 0 | not specified |
| Class 2 | 2 MB/s |
| Class 4 | 4 MB/s |
| Class 6 | 6 MB/s |
| Class 10 | 10 MB/s |
With the ‘x’ speed rating 1x refers to a write speed of 150kb per second and the card is given a rating based on this.
| Speed rating | Write speed |
|---|---|
| 13x | 2 MB/s |
| 26x | 4 MB/s |
| 32x | 5 MB/s |
| 40x | 6 MB/s |
| 66x | 10 MB/s |
| 100x | 15 MB/s |
| 133x | 20 MB/s |
| 150x | 26 MB/s |
| 200x | 30 MB/s |
| 266x | 40 MB/s |
| 300x | 45 MB/s |
| 400x | 60 MB/s |
| 600x | 90 MB/s |
The camera you are purchasing and the type of photographs you intend to shoot will determine how fast you need your card to be, while the number of photos you are likely to shoot in one go will indicate what size card you should be looking at.
Bag/case
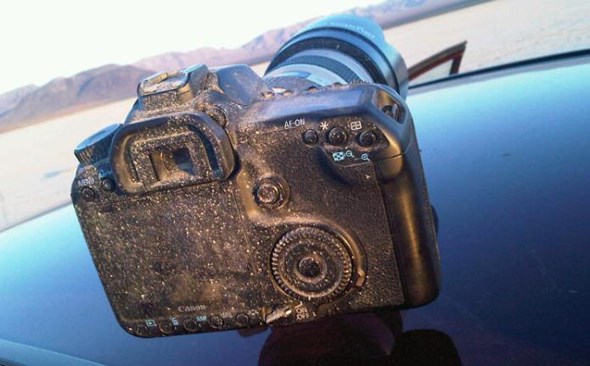
Some digital SLRs can cost around the same price as a small car, but even if you’ve spent a far more modest amount on your new camera, the chances are that you will still want to look after it. The dangers a camera faces are seemingly endless; during winter months damp, cold and condensation can all pose a significant health risk, while in the summer dust, pollen and heat can be equally damaging. And that’s before you take into account the risks involved in actually using the camera out and about, where it can be dropped, banged into, scratched, knocked and generally abused.
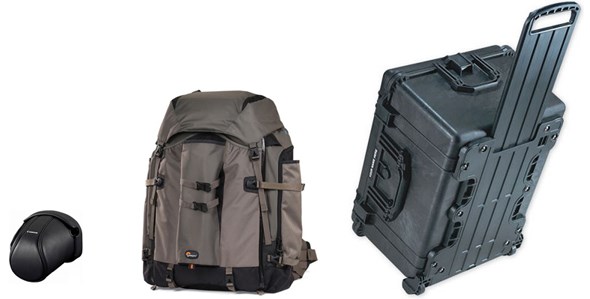
A decent camera bag not only offers vital protection from everyday knocks and bumps, but also provides a far more convenient method of transporting your camera gear than simply stuffing it into your pockets. There are a huge variety of bags available, from those which house just your camera and a lens for protection with minimum bulk, to those which will take your camera, al your lenses, a tripod, a change of clothes, your lunch and the kitchen sink. There are shoulder bags, backpacks, waist-belts, hard cases and many more variations and the exact type and model will of course depend what you intend to use it for and how much equipment you need. A rolling case with extending handle is ideal for transporting multiple cameras and a collection of lenses and accessories through airport terminals, but is less suited to carrying a single camera and lens combination across mountain passes.
For a further, more detailed look at the variety of bags on offer and how to choose the right one for you check out our wittily titled “Bags of fun for everyone” guide to photo bags.
Spare battery
Yes your new SLR will come with a battery and yes it will be rechargeable. As such you may feel that purchasing an additional battery is unnecessary, but before you overlook a spare in favour of a slightly more exciting way to spend your money, just think about the benefits that an extra power cell will offer.
Firstly you would have to be an extremely disciplined photographer to remember to put your battery on charge after every time that you’ve used your camera. It only means you forgetting to do it once, and the next time you come to use your camera you have little or no power. Having a fully charged back-up on stand by will save your photography.
It’s also quite possible for a photographer to run out of power during an intensive day’s shooting. If you’re out and about when this happens and you don’t have a spare, you’ll have to stop taking pictures. Bear in mind that even though most modern digital batteries will last for some time, cold weather, prolonged use of the LCD screen and regular firing of a built in flash will all drain the battery faster. In very cold weather a battery can stop working even if it still has power. Keeping a spare battery on your person means you can swap over and warm the dead battery back to life while using the spare.
Finally, although unusual, it’s not unheard of for a battery to fail. All batteries have a finite life and if you are only using the one battery, recharging and discharging it over and over again, it will eventually fail. The law according to Murphy dictates that any failure will place at the most inopportune moment, thus maximising the disaster/embarrassment/frustration factor. As such, a spare battery is excellent insurance.
So there are some good reasons for investing in at least one spare battery, and that’s before you take battery grips into account (see later section)…
Lens hoods
Question: why do you need a lens hood? If your answer is “to shade the lens from incidental light that can cause flare and distortions in a photograph” then you are right. Well, partly right. You see, although shading the lens is a lens hood’s primary function (they are sometimes known as lens shades) they also offer a significant amount to protection to the front element of your lens from more physical threats. As well as light, a lens hood will also shade your lens from dust and moisture in the air and, perhaps most importantly, acts as a bumper for your lens, protecting against impact.
If you carry your camera around your neck as you move about or navigate around an obstacle (a stile, gate, doorway, people etc.) you can suddenly find your camera being swung into said obstacle at an unhealthy velocity, and more often than not it will be the front of the lens that absorbs the impact. A lens hood will not only act as a physical barrier to prevent the glass from coming into contact with the obstacle, but if anything is going to break as a result of the lens/object interaction, it will be the lens hood rather than a more important component.
Cleaning kit
Fact: if you use your camera, it will get dirty. The more you use it, the dirtier it is likely to get. Even if you don’t take your SLR up mountains, across fields or through woods, dust, moisture and greasy marks from your hands and face can build up on your camera’s lens, LCD screen and eyepiece. As such, a basic cleaning kit comprising of a soft brush, a lint free cloth and an air blower is a sensible and relatively cheap purchase for any new SLR owner.
You may also be aware that your camera’s sensor can pick up dust and marks over time. While there are cleaning kits designed specifically for this, not everybody is comfortable with cleaning their own sensor and would prefer to get it done by a professional. In addition, some manufacturers do not recommend that you clean the sensor yourself. However, cleaning the external surfaces of your camera and lens is not only easy, but is something that every SLR owner should regularly do. A smear on the front element of your lens can spoil an otherwise excellent photograph, and passing your camera to a someone to show off a great shot on your camera’s LCD screen is embarrassing when the first thing they do is wipe a greasy nose smear off the glass!
Recommended
Filters
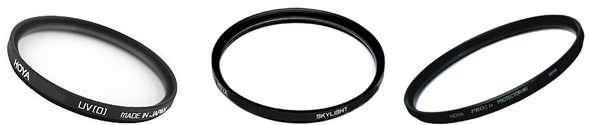
Depending who you ask, you may be told that a lens filter is an essential purchase. Specifically, a clear-glass Skylight, UV or Protector filter is often recommended as a way to protect your lens. Screwed onto the front of your lens, one of these filters will offer very little change to your shots, but will help to prevent the front element of your lens from being scratched. However, other people may tell you that putting any extra glass in front of your lens will be detrimental to the final image quality of your shots, and that the top-end telephoto lenses have a replaceable glass element anyway, so there’s no need to add yet more glass to these lenses.
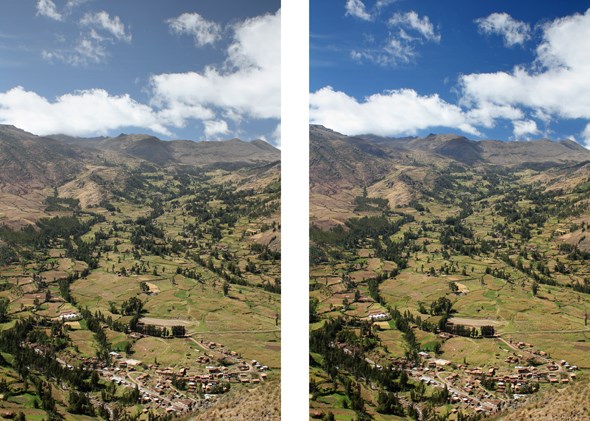
It’s your own choice, of course, but personally I prefer lens hoods (see Essential accessories above) to filters as a means of protection, using the latter only when I want to apply a specific effect or change to my photographs. In today’s age of digital manipulation, many creative filters have become redundant as the effects can be easily recreated using software. That said, there are still some effects which are better applied with filters at the time of shooting rather than in Photoshop. Circular Polarising filters enhance colours and reduce glare and reflections and are perhaps the most difficult to recreate using software so are an excellent addition to your kit bag. Landscape photographers tend to be strong advocates of the circular polarising filter as it can add punch to skies and eliminate unwanted reflections from water and shiny surfaces. When mounted on the lens they can be freely rotated to change and control the effect of the polarising.
Linear vs. Circular Polarisers
There are 2 types of polarising filter: Linear Polarisers (sometimes denoted as PL) and Circular Polarisers (PL-CIR). They both do exactly the same job and, somewhat confusingly, can both be circular in shape.
The difference between the two is how the polarising effect is created, but all you really need to know is this: if you have an auto-focus SLR camera with an internal flip-up mirror you will need a Circular Polariser to ensure auto-focus still works correctly. A Linear Polariser can confuse the auto-focus sensor and is therefore only suitable for manual focus SLRs or cameras without an internal mirror such as compact cameras and the latest mirror-less interchangeable lens system models.
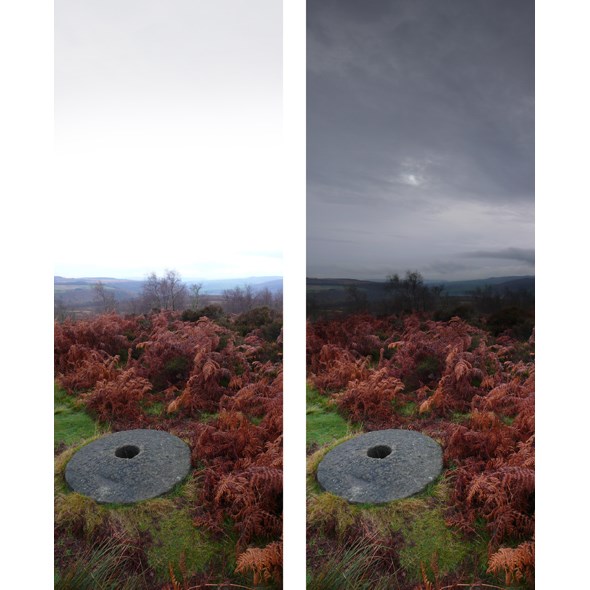
Another favourite of the landscape photographer is the Graduated Neutral Density filter. These filters gradually darken across the image, going from tinted at one side to clear at the other. The strength of the tint and how the graduation appears varies depending on the filter, but these graduated ND filters are regularly used by photographers to help balance a bright sky against a duller foreground and can be used in conjunction with a polarising filter for maximum effect.
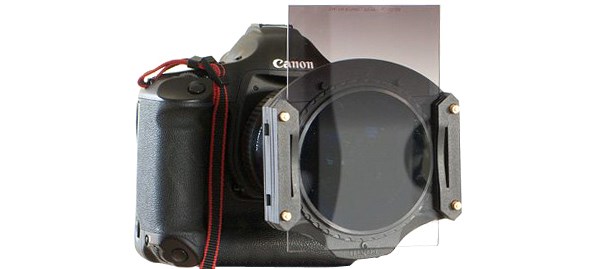
Because of the need to position the graduation in exactly the right place for the image, the best way to use a graduated ND filter is in the form of a square or rectangular filter such as the Lee or Cokin systems. These allow you to slide the filter up and down in a holder to position it correctly.
As well as the graduated variety, a straight forward Neutral Density filter can also be useful. These are also available in a range of strengths and act much like sunglasses for your lens, reducing the brightness of an image without affecting the colour (hence “neutral”). There may be occasions where you want to use a wide aperture to minimise depth of field but where the bright lighting means that even at the fastest shutter-speed and the lowest ISO there’s too much light coming into the lens – for example, portrait shots outside on a sunny day. A Neutral Density filter will reduce the light, enabling wider apertures.
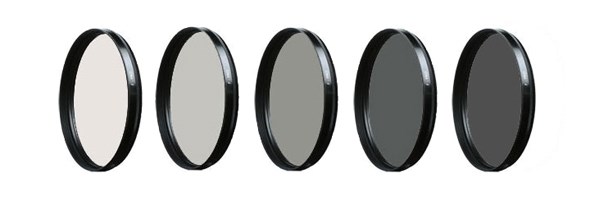
Another frequently seen use for an ND filter is to permit the use of longer shutter-speeds, again by reducing the light entering the lens. This means shutter-speeds of seconds rather than a fraction of a second can be used to get motion blur effects. Although this has a variety of creative applications, by far and away the most common is blurring the movement of water in waterfalls or waves to create a milky texture to the water, something that requires long exposure times which are easily facilitated with a dark neutral Density filter.

There are a whole host of different filters other than those mentioned here, including coloured filters, diffusers and a vast array of bizarre and unusual effects, but the Skylight, UV, Protector, Circular Polarising and Graduated and Full Neutral Density filters are probably the most useful and the filters you may want to consider adding to your kit.
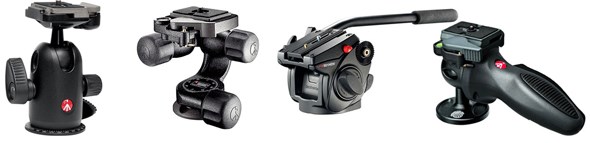
Tripod
Many photographers manage quite nicely without a tripod and if your photography is mainly of fast-moving subjects that require a fast shutter-speed anyway, then a tripod may not be essential. That said, plenty of wildlife and sports photographers still use them to help keep their huge lenses steady, and if landscape photography is your thing, then a decent tripod can be as important as the camera and lens that sit on it.
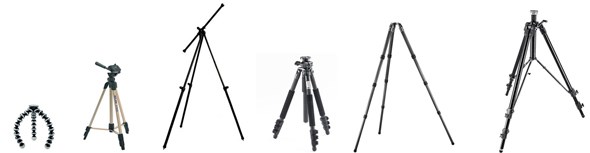
Tripods come in all sorts of shapes and sizes, and it’s possible to pick up a lightweight tripod complete with a head relatively cheaply. However, a tripod's one and only function is to keep your camera absolutely still to avoid blurred images and as simple as this task may seem, some tripods do it better than others. Confusingly, the better, more expensive tripods tend not to be equipped with a tripod head as standard. A tripod is essentially just 3 legs with a platform – it’s the tripod head that allows you to point your camera in different directions and position your shot exactly as you want it. The advantage of buying the tripod legs and heads separately is that, while all tripod legs essentially do the same job, the heads can be very different depending on their designated use, so being able to chose the exact ball, pan, or 3-way head that you need allows you to get the perfect, tailored set-up for your photography.
Battery grip
A battery grip attaches to the bottom of your camera to provide extra battery capacity and additional controls and, if available for your camera (not all models will accept a battery grip) is another sensible addition to your photography kit that offers several advantages.
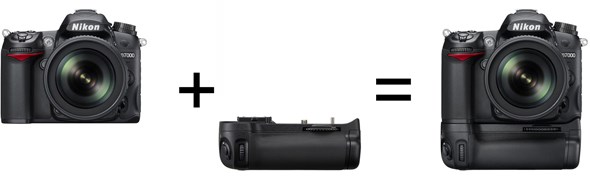
As the name suggests, battery grips offer some benefits in terms of powering the camera. Most grips allow you to use 2 of the camera’s standard batteries simultaneously for longer use without having to stop and change battery packs. Many of these grips are also supplied with an insert that allows normal AA batteries to be used in place of the camera specific lithium ion packs. This is a real advantage when shooting out and about as, should your battery fail and you’re not carrying a spare (see Essential accessories above), the ubiquitous AA battery is far more easily acquired than the model specific battery supplied with your camera.
Battery grips are also sometimes known as “vertical control grips” because of the additional controls they provide. More specifically, most feature a shutter button, a control dial and other buttons that make these functions easier to access and operate when the camera is being used in the vertical or “portrait” position.
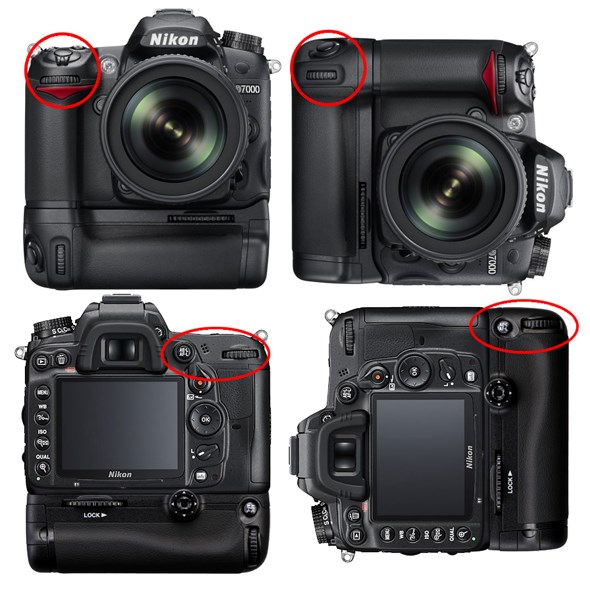
Finally, with digital SLR cameras seemingly getting smaller, gents (and ladies) with larger hands can sometimes find the latest models a little awkward to hold and operate. A battery grip obviously adds bulk to the SLR it is attached to and can make smaller cameras more comfortable in the hand, particularly when larger, heavier lenses are being used.
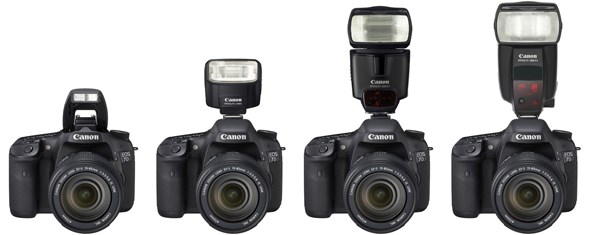
Flashgun
Bizarrely, the most expensive digital SLR cameras don’t come equipped with a built in flash, but even if you’ve purchased a model that does have its own pop-up strobe there are good reasons to consider purchasing an additional dedicated flashgun.
The obvious benefit is one of power. The guide number (a measurement of the flash’s illumination strength) for an SLR’s built-in, pop-up flash is around 15m at ISO 100, where as even Canon’s smallest external hot-shoe mounted flashgun, the 270EX II, has a guide number of nearly double that at 27m at ISO 100. Taking Canon as an example, their next models up from the 270EX II are the 320EX and 430EX II flashguns, which have guide numbers of 32m and 43m, respectively. Their top-end flashgun, the 600EX-RT has a guide number of , yes – you've guessed it, 60m – 4x more powerful than a built-in flash.
Another advantage is that the light output from the flash is moved away from the lens. In general, the closer the lens and flash are, the greater the chance of “Red-Eye” in photographs, which can turn make even the most angelic of children appear look like a demon from the underworld.

Moving the light source away from the lens, even if it’s only raised by a few inches as in the case of most hot-shoe mounted flashes, can help reduce the occurrences of red-eye. What’s more, if you move the flash even further away from the camera then red-eye can be banished altogether. Off-camera flash cables allow flashguns to be used off the camera. They tend to be around 1ft/30cm to 3ft/90cm in length and attach to the camera at one end, the flashgun at the other and still allow full communication between the two. However, many of the latest digital SLRs and flashguns have gone a step further by allowing completely wireless communication.
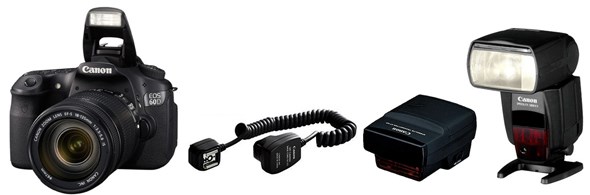
This relies on the camera having a built in wireless flash control and the flashgun being wireless compatible, but allows for the flash to be mounted some distance away from the camera for creative lighting options. Even cameras without the wireless control can be used in this manner by using a dedicated control module on the hot-shoe, or by using a flashgun that has a command mode (wireless transmitter) as well as a receiver built into it. This way it’s possible to use one flash mounted on the camera to control another flash mounted off camera.
For a more in-depth look at flashguns and what to look for if you're considering investing in one, have a look at our Guide to Lighting Options: Flashguns written by our lighting expert Steve Aves.
Card reader
All digital SLR cameras come equipped with the means to get your photographs from the memory card in the camera on to your computer. The included USB cable connects to your camera at one end, your computer at the other and offers a straightforward method of data transfer. The downside is that this method is usually not particularly quick and also means your camera can not be used while the transfer is taking place. A far easier and more convenient method is to use a card reader. These can be left plugged into your computer via a USB or Firewire port (depending on type) and you simply plug your memory card into them when you need to download your shots. A decent card reader such as the UDMA compatible models will transfer data far faster than using the camera’s USB cable and allow you to continue shooting with your camera while the images download.
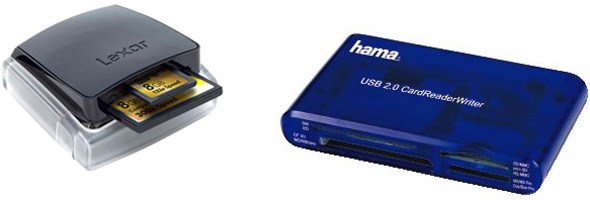
There are card readers dedicated for particular memory card types (Secure Digital, Compact Flash, etc.) or you can purchase a multi-card reader that will take almost any memory card - a great idea if you have different cameras using different memory in your household.
Worth considering
Remote
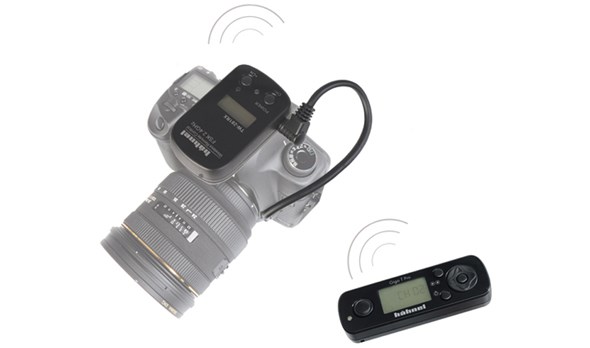
The main reason for owning a remote shutter release has always been as a method for firing the shutter without physically touching the camera, thus avoiding introducing camera shake. The two main types of remote are the cabled variety and the wireless variety, the latter usually using infra-red to trigger compatible cameras. However, things have moved on and the role of the humble remote is far more advanced than it used to be. As well as providing an off-camera shutter button, some cabled remotes offer a wealth of other features including a countdown timer, long-exposure timers, interval timers and multiple-shot options.
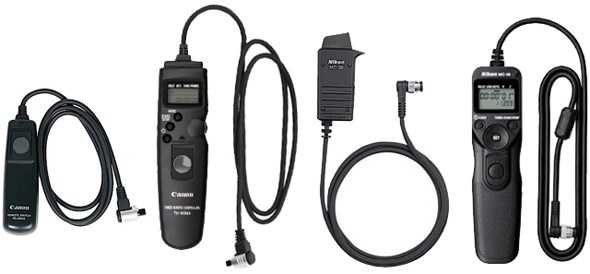
Wireless remotes can now make use of radio signals to dramatically increase the distance over which they are effective in comparison with infra-red triggers. These radio triggers usually consist of 2 parts; the trigger transmitter and the receiver which is mounted on or next to the camera and plugs in the camera’s remote socket. These radio remotes allow the camera to be fired from as far away as 100 metres and can often be seen being used by sports photographers at football matches to trigger “behind-the-goal” shots remotely.
Adobe Photoshop
Digital manipulation is now as much a part of photography as metering and composition. Image manipulation has always existed in one form or another, but what used to take hours in the red-light of a darkroom can now been done in minutes on a laptop in your living room. And you don’t have to be creating bizarre visual works of fiction to appreciate what software like Adobe Photoshop can do for your images. Small, subtle tweaks in colour, lighting and tone can all help make an image special, while removing distracting elements such as red-eyes or over-head wires from a shot may be considered by some as cheating, but will definitely improve the aesthetics of your photographs.
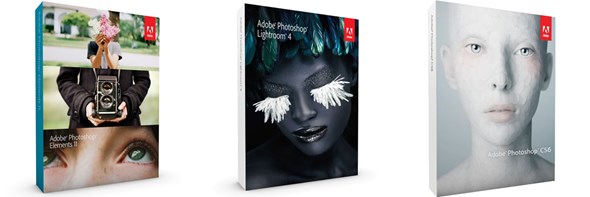
Adobe Photoshop is the industry leading software for digital manipulation, but if it looks over complicated or its hefty price tag puts you off, the stripped down Adobe Photoshop Elements may be just what you’re looking for. It offers most of the tools and effects that any photographer will need, without all the bells and whistles that the full version offers for graphic designers or artists. Adobe Photoshop Lightroom is another incredibly popular software choice for photographers, as it allows you to edit photos individually or process large numbers of photos all at once. It's also an excellent system for organising, key-wording and in turn searching your archive of images
Hard drive/Portable storage
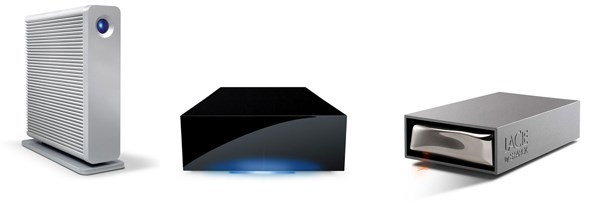
Most people have a box of old photographs stuffed away somewhere. Often they sit there doing nothing for years on end, just being pulled out on the odd occasion for a bout of nostalgia or to embarrass the children when they bring the new boy/girlfriend round for the first time. With digital these piles of old photographs are likely to be a thing of the past – how many of us ever get round to printing all the photos we have stored on our computers? As such, the vast majority of photos taken with digital cameras will languish forever on a hard-drive somewhere. But like all electronic equipment, hard drives can fail, and if your home computer crashed or was damaged tomorrow, would you still be able to get all those photos back? One of, if not the best ways to protect your digital photo files is to back them up and keep copies. If you save your photos on your computer’s hard drive, it’s worth also saving them on an external hard drive. If you already save all your images to an external hard-drive, having an additional drive to back up your files means that, if one drive fails, you can always retrieve your images from the second.
Professionals have known about the benefits of hard-drives and backing-up for years, but the home user has been slower to catch on. If you just think about how many memories would be lost if your computer died and couldn’t be rescued, you might just consider a desk-top hard drive a worthy investment.
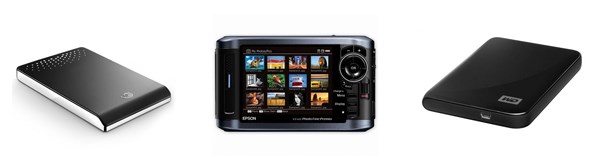
Portable hard drives are also a useful addition to your kit bag, but for slightly different reasons. These allow you to download the contents of your memory card to them while you are out and about. They can be used to transfer images from your memory card, thus allowing the card to be re-formatted and reused or, more sensibly, you can back your photos up onto a portable drive as well as keeping them on the card, minimising the risks of losing important photographs until you are back home and able to store them properly.
Wireless transmitters
One of the strange concepts of digital photography is that once you've taken a photo you’re not dealing with a physical object as you would have been in the past with a frame of film. Instead, you have a digital representation of an image which can be transferred from camera to computer and from computer to phone and from phone to website and from website back to computer again, all in a matter of seconds if so required. Wireless transmitters take this concept a stage further by making this data transfer completely wireless. With a dedicated transmitter fitted to your camera, images can be sent directly from the memory card in your camera to a compatible laptop or computer as soon as they are taken. Photographers using this technology to great effect include sports photographers who may even operate the camera completely remotely from a distance, and studio based photographers who may want their assistant to start working on an image as soon as the photo has been taken, while they carry on shooting more images.
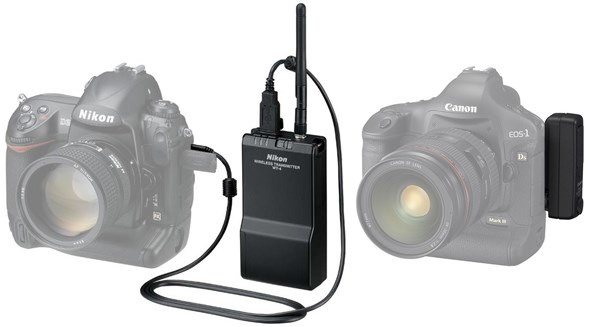
For the dedicated enthusiast, a wireless transmitter may be seen as something of a luxury – they’re not exactly cheap – but if you shoot a lot of photographs in a single location such as a studio, or from a set point at an event or sports venue, then you may decide that this added convenience is a luxury worth paying for.
Subject specific gear
Naturally there are some accessories that are designed to serve a very specific purpose for a particular type of photography. Here is a quick rundown of some accessories worth considering for the specialist photographer.
The studio photographer
You can do quite a lot now with just the camera and a couple of flashguns, but if the studio is where you like to spend your photography time, a proper lighting kit will help you hone your photographic skills and produce top-notch portraits. In terms of price they range from the very reasonable to the vastly expensive, so it’s worth investigating the options and taking into account what you may want to do in the future, as well as what you need it for today.

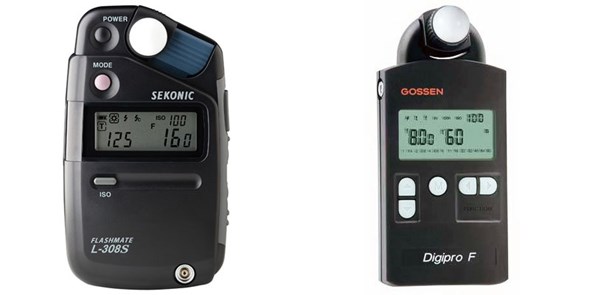
Although digital cameras allow far more of a trial-and-error approach to metering and exposure with studio lights, there is a quicker and more convenient option. A light meter makes it easy to calculate and adjust the correct exposure for your flash photography, saving a huge amount of time.
For a more in-depth look at studio lighting and what to look for if you're considering investing in a kit, have a look at our Guide to Lighting Options: Studio Flash written by our lighting expert Steve Aves.
The wildlife photographer
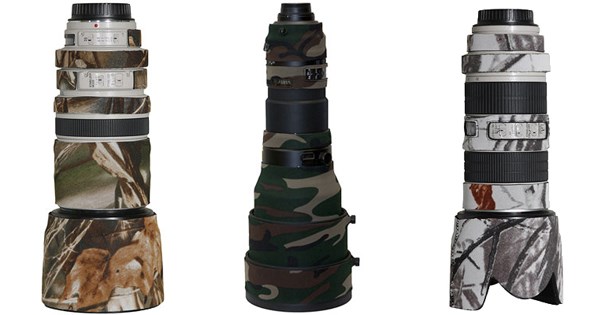
Field skills, planning and patience are as important in wildlife photography as cameras and lenses. While you can’t as yet buy anything that will automatically locate the wildlife and guarantee you a great shot, there are some products available that might just help by making you a little less visible and more comfortable in the process. A camouflaged LensCoat not only help make your camera gear less conspicuous, but also offers some protection and makes your gear more comfortable to hold in cold weather.
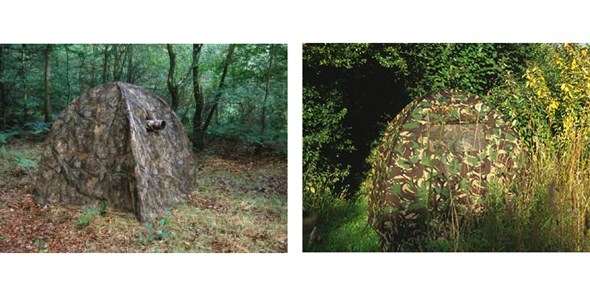
If you want to take the whole camouflage/comfort combination to the next level, a Wildlife Hide offers both. Set one up in appropriate surroundings and not only will you be far less visible to wildlife, but you will also be protected from the worst of the weather while you wait. And if there’s one thing you can guarantee when it comes to wildlife photography, it’s waiting...
The macro photographer
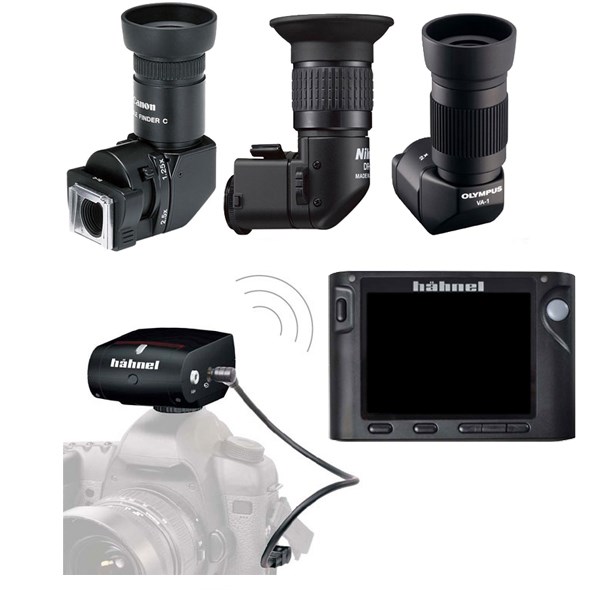
When the subjects of your photography are both small and close to the ground, something as simple as composing your shot can become a challenge. Putting your eye to the viewfinder without getting a face full of dirt isn’t easy when your camera’s at ground level and although articulating screens can make it easier, there are products that will make it easier still. Dedicated Angle Finders from Canon, Nikon, and Olympus attach to certain camera models to provide a 90 degree view through the eyepiece. The digital Hahnel Inspire Wireless offers ultimate convenience by transferring live view to a 3.5” colour LCD screen wirelessly and can also be used to trigger the shutter, ensuring you never need get your knees dirty again!
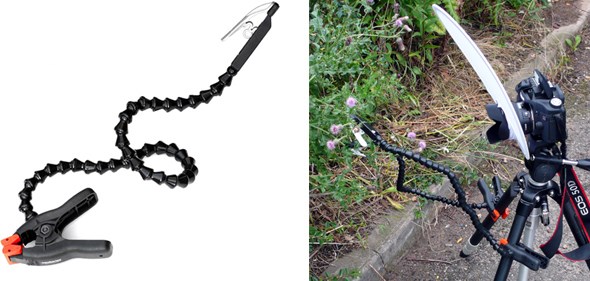
The other problem with macro photography is that distracting elements often get in the way – plants, branches etc., and on a windy day, if your chosen subject is something as delicate as a flower or plant, keeping it in the shot can be more than a little tricky. Fear not, for help is at hand in the form of The Plamp! This device has a single purpose – to clamp plants in or out of your shot, but for flower photographers, it is a veritable “must have” for the kit bag!
The landscape photographer
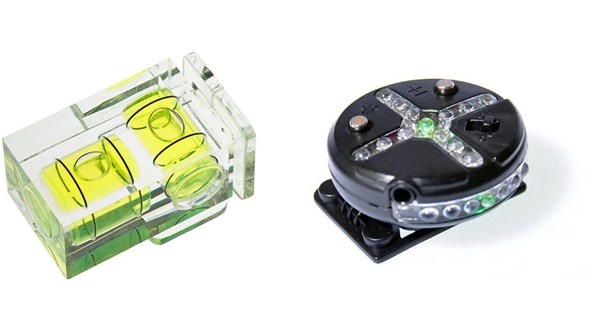
Two things are the curse of the landscape photographer: the weather, and sloping horizons. The latter can be solved very easily through the use of an on-camera levelling device. For the budget conscious there are several bubble-level type devices that offer a cheap and simple solution to getting your camera level. For those who like gadgets and fancy technology, digital versions also exist that indicate how level the camera is with illuminated LEDs. The Seculine Action Level Cross is one such item. It does much the same job as a bubble-level, but is more accurate, easier to read and makes your camera look like something out of the flight deck of an aircraft. Very cool, if you like that sort of thing.
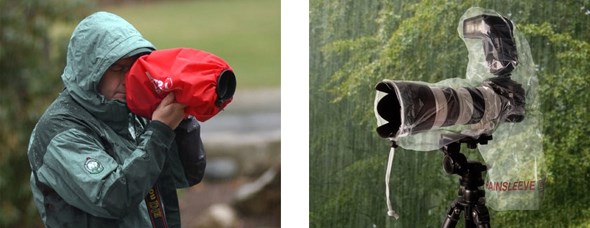
While the weather is a little harder to control (ok – impossible), if you are a dedicated all-weather photographer who’s out taking landscape shots come rain or shine, there are easy and convenient ways to protect your camera gear from a drenching at the hands of Mother Nature. A Camera Rain Cover does exactly what its name suggests – it covers your camera and protects it from the rain. These vary in design and price from the very cheap and basic that look a lot like a plastic bag (but do the job), to the more expensive and robust versions that are tailored for specific camera and lens set-ups. Which you need will depend on how often you intend to expose your camera to the elements, but just make sure that you’re as well protected as your gear is!
Food for thought
Hopefully this has provided you with some insight into the vast range of accessories that are available for today’s digital SLR cameras. The sheer variety and quantity on offer can be baffling and intimidating, but considering the options in terms of what will be most useful to you and the photography you shoot is a good place to start. And don’t forget, if you need further help deciphering the options, Wex Photographic are here to help! Give us a call or email, or contact us via Live Chat and we’ll do our best to help. Many of us have been through exactly the same decision making process for our own camera gear, so we just might be able to offer some worthwhile advice!
