Push your portraits further. Jake Hicks demonstrates three lighting setups to get you thinking outside the (soft)box
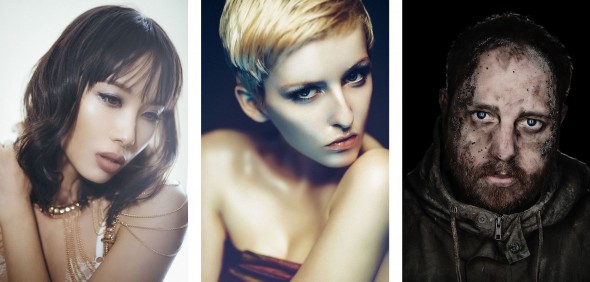
All images by Jake Hicks
Whether you’re a commercial photographer shooting full time or somebody who loves to shoot portraits at the weekends, we all have our favourite go-to lighting setups that we know will guarantee us an awesome shot in any situation.
This might be as simple as a softbox in front of a window or even a ring flash in front of a white wall – there’s nothing wrong with these setups or their results, but things can get a little stale when they result in us shooting the same thing over and over again.
In this article I aim to show you three creative lighting techniques, combining a few things you probably already have in the studio in order to create something different and to add a few more setups to your lighting toolkit.
Setup 1 – Coloured fill
This setup is actually very simple to implement as it only requires two lights and a carefully placed reflector to add some colour and interest.
What you will need:
- 2 flashes
- 1 key-light modifier – softbox or beauty dish is ideal
- 1 regular dish reflector for your second light
- 1 silver medium-sized reflector (32in/80cm)
- 1 coloured gel
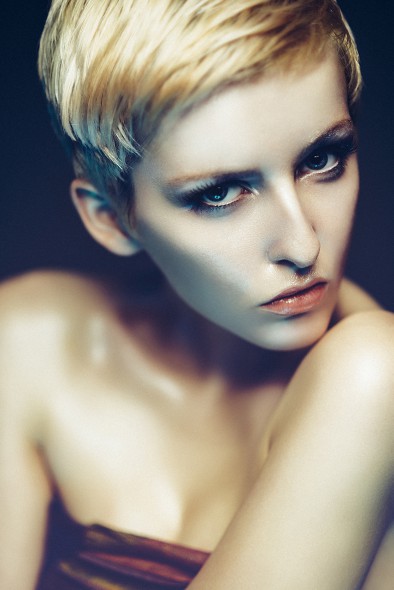
First up, we’ll need to position our subject in front of our backdrop. You can use a black background or simply position your subject so that no light falls onto the wall behind them. Personally I prefer this look with a darker background, but white can work just as well.
Next we need to set up our key light with our preferred modifier. I used a silver beauty dish in the shot above as I personally find this a little easier than a softbox to use for this technique. The beauty dish gives a stronger shadow than a softbox, which makes it easier for us to add colour too later on.
I positioned my beauty dish at about arm’s length away from the model and angled it down at about 45 degrees to create a strong shadow under the model’s chin.
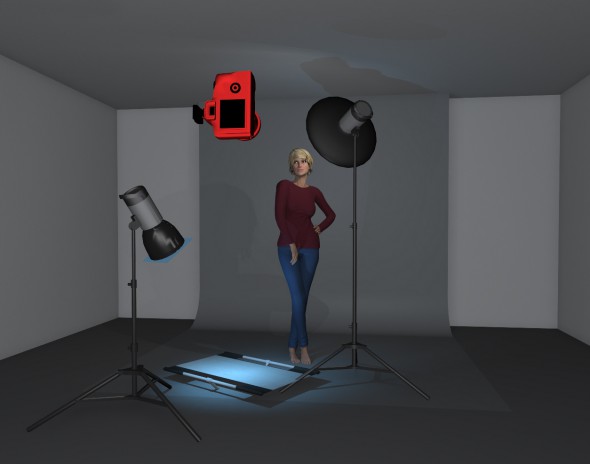
Once we’re happy with that, it’s time to bring in our second light. This is the light with a basic reflector dish attached to it, so simply affix a coloured gel over it and make sure that no white light can escape.
Lastly we need to bring in our silver reflector and place it on the ground in front of our subject’s feet.
Now all that’s left is to point our gelled light down towards the reflector and allow it bounce the coloured light back up into our shot, filling those shadows we created in with colour. Play around with the position of the reflector if you need to, as this will change the intensity of the coloured fill.
Setup 2 – Softbox glow
In this next setup we’re going to tweak a much-loved beauty and portrait lighting technique by reducing the amount of flare and blown-out highlights you’d normally get from having your subject stand directly in front a softbox.
What you will need:
- 2 flashes
- 1 large softbox (large enough to surround the subject that stands in front of it)
- 1 key light modifier – this could be another large softbox or a beauty dish
- 1 large sheet of white card or perspex
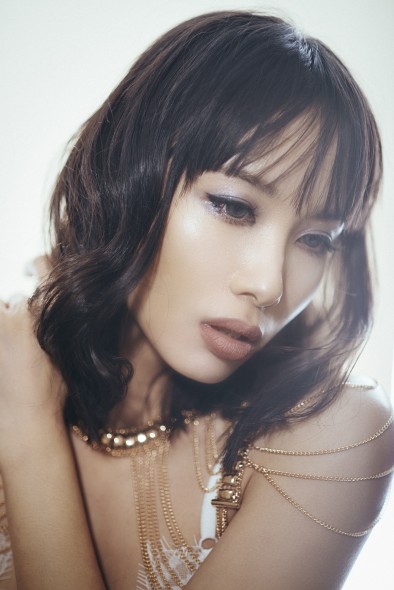
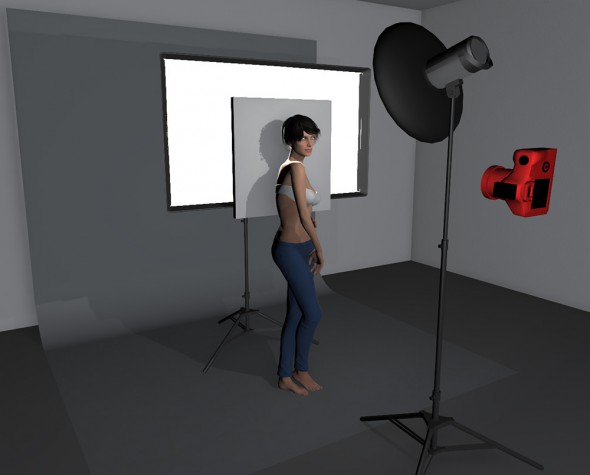
This lighting technique works by essentially sandwiching your subject between two lights. The first flash should have a large softbox attached to it and the subject should be asked to stand in front of it.
Next you’ll need to set up your key light in front of them; again I used a beauty dish for my picture here, but if you only have another softbox then that should be fine as well. You’re only taking headshots with this setup, so you want the key light nice and close to allow that wraparound lighting to take effect.
The setup you’ve just created is a very common one, much loved by beauty and portrait photographers because it creates a very soft and beautifying look. The problem I have with it is that the light from behind our subject often blows out the highlights on the subject’s skin and hair, leaving a less than desirable look.
So, to combat this, we’re now going to introduce our white card or perspex behind the model. Place it between the model and the softbox, ensuring that you can still see the softbox around the outside of the card. I attached mine with a clamp on a stand behind the model, but you can always get somebody to hold it if you need to.
Now we’ve heavily reduced the intensity of light directly behind the subject, while still allowing enough light to spill around our white card to light the edges of our subject, giving them a gorgeous glow but without blown-out highlights.
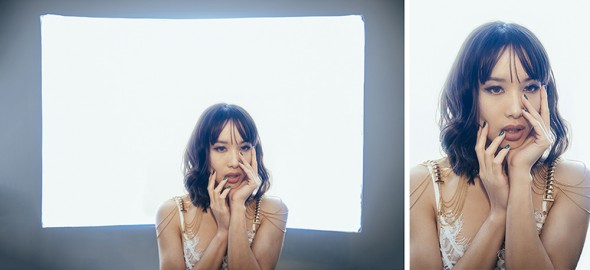
In the above image, you can see that without something to reduce the amount of light directly behind the subject that the highlights and flare is very strong.
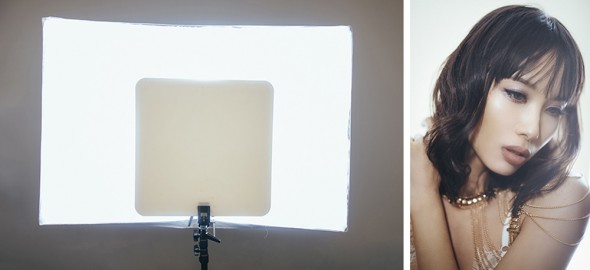
As soon as we introduce a white flag behind the subject the flare and highlights are reduced.
Setup 3 – Strip box key lights
I know a lot of photographers who own the long, thin strip boxes but I only ever see them being used as side lights to add highlights to the subject and not as key lights.
In this lighting technique I look at how we can use strip softboxes to add depth and drama to our subject while using them as key light modifiers.
What you will need:
- 3 flashes (the third flash is optional if you are photographing your subject against a light coloured background)
- 2 strip boxes – the ones I used here are 90cm x 20cm
- 1 simple reflector dish for your third flash if you're using it
- 2 black flags – these can be large pieces of black card or even black fabric
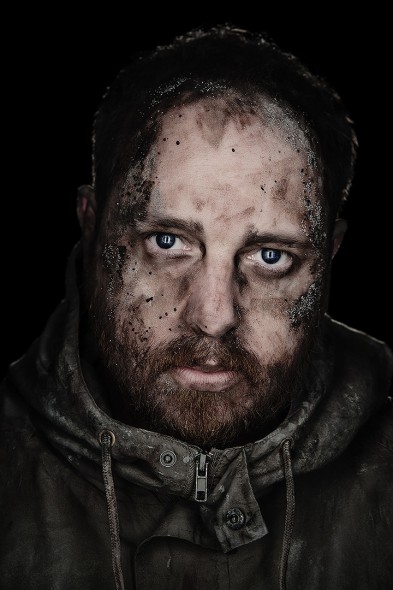
This particular shot was taken for an album cover where the artist wanted a grimy and dishevelled look to play a key role in the finished piece. The lighting I used needed to compliment that and because it was going to be full-face shot, I wanted to show a lot of depth with the lighting.
To do this, I needed my lighting to drop off to shadow very quickly and one way to do that in photography is to bring the lighting as close as possible to the subject.
There is only one problem with having your lighting so close to the subject, and that’s the simple logistical fact that it leaves very little room for you and your camera to actually take a picture. One modifier that solves this problem is the ringflash, which you simply shoot through the middle of, no matter how close you are. The ringflash however gives a very stark pop-video-esque look that I knew my client wanted to avoid, so I came up with the idea to shoot between two strip boxes instead.
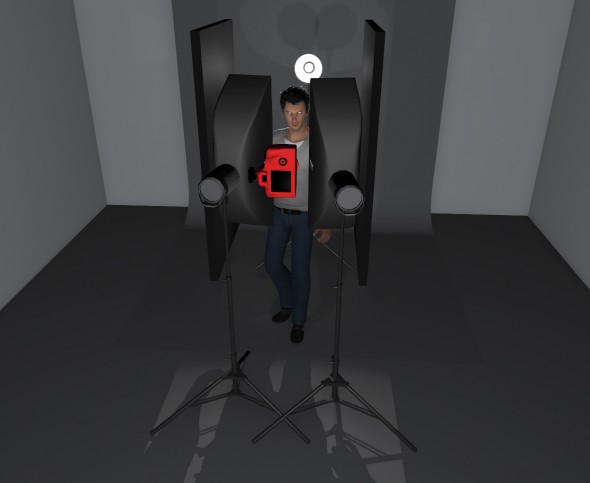
To achieve this look I placed my two strip boxes directly in front of the subject, about 30cm-50cm away, and placed them just wide enough apart for me to get between them with my camera.
To control the light even further I also added two black boards either side of the subject’s head to ensure that no light bounced around and illuminated the sides of the head. Lastly I wanted to separate the subject from the dark background behind them so I added a third flash behind the client pointing back towards their head to add a touch of rim-lighting. If you were photographing your subject against a lighter coloured background you might not need this addition.
Want to learn more about portraiture? Watch our video series with pro portrait photographer Hannah Couzens
About the Author
Jake Hicks is an editorial and fashion photographer specialising in keeping the skill in the camera not just on the screen. jakehicksphotography.com
Related articles
Three Spectacular One-Light Portrait Setups
Focus on Family Portraits
How to Shoot Better Portraits

